


When Mail or Safari is unable to verify an SSL certificate, Apple devices display the “Cannot Verify Server Identity” message. Although it guards against data theft, incorrect settings or expired certifications are frequently the problem. In this guide, we will walk you through all the practical steps to fix the issue and restore secure connections.
Why Does My Device Say “Cannot Verify Server Identity”?
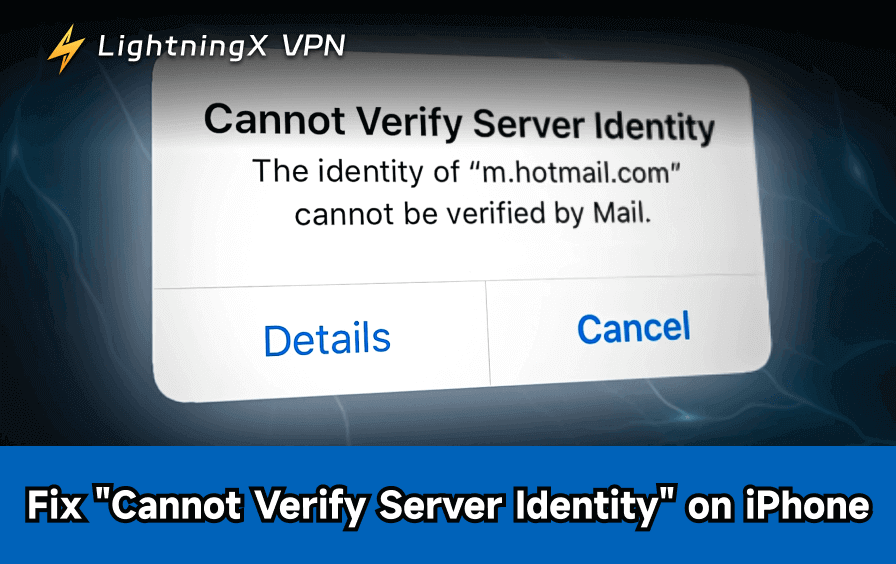
This error often occurs when the SSL certificate provided by your email server (like Outlook or Gmail) doesn’t match the expected credentials.
Common causes include:
- Expired SSL Certificates: The server owner forgot to renew their security credentials.
- Incorrect Date/Time: If your device time is wrong, it cannot validate the certificate’s timeline.
- Wrong Server Hostnames: Using mail.yourdomain.com instead of the official provider hostname.
- Software Glitches: Temporary bugs in iOS or macOS interfering with network handshakes.
Fix 1: Perform a Soft Reset on Your Device
The most common reason for this error is a hung network process. Modern operating systems manage hundreds of background tasks, and sometimes the identity validation service simply stalls.
- For iPhone Users: Depending on your model, press and quickly release the Volume Up button, then the Volume Down button, and finally hold the Side button until the Apple logo appears.
- For Mac Users: Click the Apple menu and select Restart.
Restarting clears the temporary cache and forces the Mail app to re-attempt the certificate handshake from scratch. This often clears errors caused by switching between Wi-Fi and cellular data.
Fix 2: Verify Your Date and Time Settings
It sounds simple, but incorrect time settings are a leading cause of certificate failures. SSL certificates have a specific “valid from” and “valid to” date. If your iPhone’s clock is manually set to a date in the past or future, it will perceive every certificate as expired or not yet valid.
- Open Settings > General.
- Tap on Date & Time.
- Ensure the toggle for Set Automatically is switched on.
- Check that the Time Zone matches your current physical location.
Fix 3: Delete and Re-add Your Email Account
If you specifically see the alert when opening your inbox, the account’s configuration files may be corrupted. This is particularly common after an iOS update.
- Step 1: Go to Settings > Mail > Accounts.
- Step 2: Choose the email account causing the issue (e.g., Yahoo, Outlook, or a private IMAP account).
- Step 3: Tap Delete Account at the bottom.
- Step 4: Restart your phone.
- Step 5: Go back to the Accounts menu and select Add Account. Re-enter your credentials.
By re-adding the account, your device automatically fetches the latest SSL certificates and server addresses from the provider, which usually solves the verification loop.
Fix 4: Close Malicious or Outdated Calendar Subscriptions
Many users don’t realize that the error can stem from the Calendar app. If you accidentally subscribed to a “spam calendar” via a website pop-up, that calendar will constantly try to sync with a malicious or expired server.
- Open the Calendars app.
- Tap the Calendars button at the bottom center.
- Look for any suspicious entries under “Subscribed.”
- Tap the (i) info button next to the calendar and select Delete Calendar.
Fix 5: Address Network Interference and Restrictions
Sometimes, the issue isn’t your phone or the server, but the network you are using. Public Wi-Fi in hotels, airports, or cafes often uses “Captive Portals” that intercept your traffic, causing a certificate mismatch.
Tip: If your local network is filtering traffic or using a restrictive firewall that triggers the “Cannot verify server identity” alert, using a professional proxy tool is the best solution. Use LightningX VPN to resolve these conflicts. It adopts advanced obfuscation and high-speed encryption to bypass local ISP throttling and DNS hijacking.
By routing your connection through a clean, secure server, LightningX VPN ensures that your device receives the correct SSL responses, effectively eliminating identity errors caused by regional network interference or public Wi-Fi security gaps.
Fix 6: Update Your Software (iOS & macOS)
Apple maintains a “Root Certificate Store.” This is a database of trusted authorities that sign certificates for the entire internet. If your software is several years old, it may not have the updated keys required to verify modern servers.
- On iPhone: Go to Settings > General > Software Update.
- On Mac: Go to System Settings > General > Software Update.
Updating to the latest version of iOS 26 or 26.2 ensures your device recognizes the newest security standards used by Google, Microsoft, and other major providers.
Fix 7: Manually Update Server Hostnames
Many small business owners use custom email addresses (e.g., info@yourbusiness.com). Often, the incoming server is set to mail.yourbusiness.com, but the SSL certificate is actually issued to the parent host, like bluehost.com or siteground.com. This mismatch triggers the “cannot verify server identity” warning.
- Go to Settings > Mail > Accounts.
- Tap the account, then tap the Account or Server Settings section.
- Check the Incoming Mail Server and Outgoing Mail Server (SMTP).
- Try changing the hostname to the official one provided by your hosting company (e.g., imap.stackmail.com instead of your own domain).
Fix 8: Clear Safari Cache and History
If you see the cannot verify server identity error while browsing the web, it might be due to outdated “HSTS” data or old cookies stored in Safari.
- Go to Settings > Safari.
- Scroll down and tap Clear History and Website Data.
- Confirm by selecting Clear History.
This forces Safari to perform a completely new security check the next time you visit a website, rather than relying on potentially cached, expired certificate info.
Fix 9: Reset All Network Settings
If you have tried everything else and the error still appears, your network configuration files might be deeply glitched. This step is a “reset to factory” for your connections.
- Go to Settings > General > Transfer or Reset iPhone.
- Tap Reset.
- Select Reset Network Settings.
- Enter your passcode.
Note: This will delete your saved Wi-Fi passwords and Bluetooth pairings, so make sure you have your Wi-Fi password handy.
Fix 10: Contact Your IT Department or ISP
If the error only happens on a specific corporate network or with a specific work email, the problem is likely at the source. The server administrator may have allowed their SSL certificate to expire.
In 2026, many automated systems handle this, but manual errors still occur. Provide them with a screenshot of the “Details” page when the error appears so they can verify the server identity on their end.
Final Thought
Resolving the “Cannot verify server identity” error is essential for maintaining a secure and functional device. By following these ten steps – from simple restarts to resetting network settings – you can eliminate pesky pop-ups and ensure your data remains encrypted. Always stay updated and use secure connections to keep your information private.


