Apple ID is the digital identity of your Apple devices. If you don’t use an email address anymore, it’s essential to disconnect it in case missing any notifications. In this blog, we will introduce how to change your Apple ID easily and offer everything you want to know about it. Follow the instructions to change into a new Apple Account quickly.
What to Do Before Changing Your Apple ID
Sign Out of Apple ID on Apple Devices: To avoid data conflicts, you need to log out of your current Apple ID first. Otherwise, it might lead to a “syncing with iCloud paused” error. Just go to Settings > Apple ID, and scroll down to tap “Sign Out”.
Backup iPhone Data Related to Your Apple ID: Before changing the Apple ID, don’t forget to save a copy of your messages, passwords, and other private information. Be aware that the data uploaded to your old iCloud will not sync with your new Apple ID.
Cancel Subscriptions & Purchases: In case you are charging an extra fee, it’s better to check the subscriptions and purchases linked to your current Apple ID. Just go to Settings > Your Name > Subscriptions and tap “Cancel All Services”.
How to Change Apple ID with Email Address?
Way 1: Change Apple ID on iPhone or iPad
- Open your Apple device and launch the Settings app.
- Press your name and click “Sign-In & Security”.
- Go to “Email & Phone Numbers”, and then tap “Edit”.
- Press your current Email address and select “Remove from Account”. If you still want to keep this primary email address but change to another one, you can also toggle off “Primary Email”.
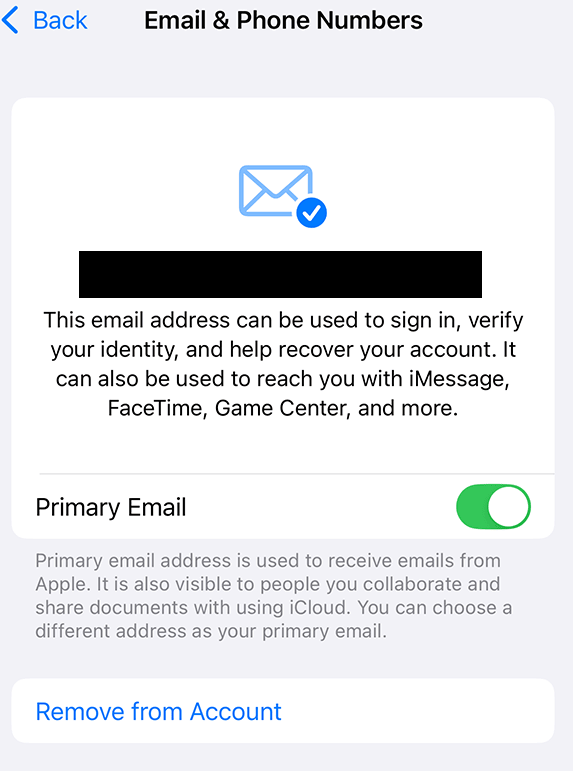
- Now you can add a new email address or connect your Apple ID with another email address.
- Follow the prompts to enter your new email address.
- Check your email and fill in the verification code.
- Now you can go to “Settings” and log in to your new email address. If you have some data left on this iPhone, it might ask whether you want to merge the data with your new Apple ID.
Please be aware that if you delete a non-iCloud email address, it can’t be linked with another Apple Account until 30 days later.
Way 2: Change Apple ID on Mac
Before we start, it’s better to ensure your Mac is updating to the latest version.
- Open your Mac and visit account.apple.com.
- Enter the login credentials and log in to your current Apple account. If you have enabled the two-step verification, don’t forget to check your iPhone and verify your identity. It might require you to permit the sign-in attempt and enter a six-digit code.
- Tap “Sign-In and Security” and select “Email & Phone Numbers”.
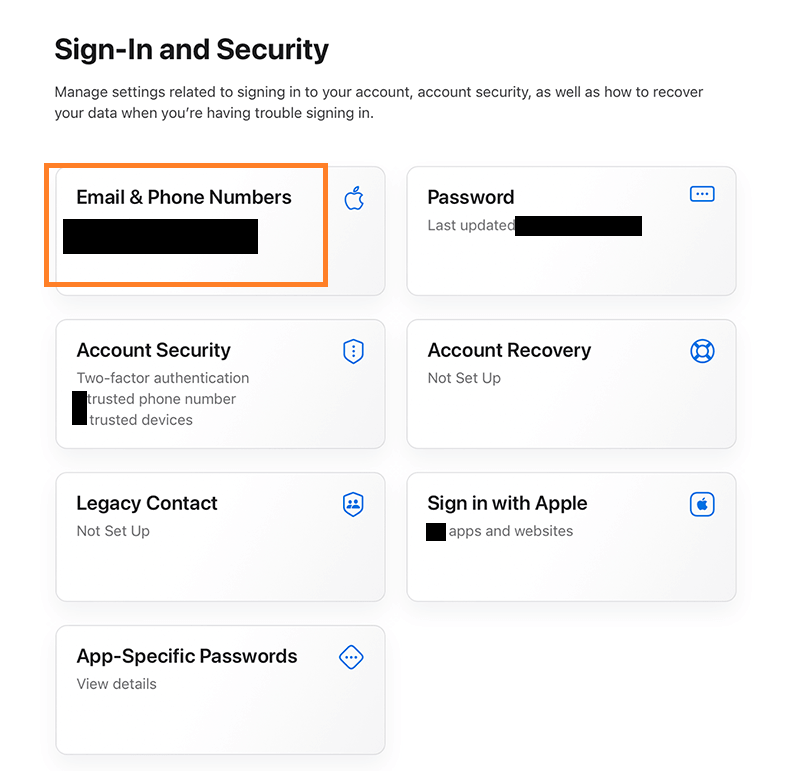
- Click the remove button next to your email address.
- Follow the instructions to verify your new email address.
- Then go to your email and confirm your identity. Now you have successfully changed your Apple ID via the browser.
- After signing in with your new Apple ID, you can select “Merge” to transfer the data with your new Apple ID.
Also read: Face ID Not Working on Your iPhone? Try These 10 Easy Fixes!
How to Change Apple ID via Phone Number?
If you create a new Apple ID in China mainland or India, you can also use a mobile phone number to log into your Apple account. Make sure you enter a different (+86) mobile phone number in China and (+91) mobile phone number in India.
However, be aware that you can’t sign in with a mobile phone number when you already use your email address. You can link them with the same Apple ID on your Apple Account page.
Via your phone: Go to Settings > Your Name > Sign-In & Security, and tap your primary phone number. Click “Remove from Account” to delete this email address. Now you can add a new phone number or link another one as your primary number.
On the web: Visit the official website of the Apple account and sign in. Tap Sign-In & Security > Apple Account and enter the new mobile phone number. Next press “Change Apple Account” and fill in the verification code sent to your phone number.
Tip:
To change your Apple ID region, you can use LightningX VPN. Supports over 50 countries and 2000+ cities, you can easily bypass IP restrictions and unblock inaccessible apps.
The seamless connection is also suitable for online gaming and streaming. With no speed limits, you can download a YouTube video within fewer seconds. Try LightningX VPN now, and enjoy safe browsing with the free trial.
How to Fix Apple ID Change Problems?
When you enter a new email address to change your Apple ID, it might say this email address is already in use. To solve this issue, you can troubleshoot whether your family members have used it or it is linked with another Apple account. Then go to account.apple.com. and tap Sign-In and Security > Email & Phone Numbers. Press the Remove button to delete this email address from other Apple IDs.
Error 2: Not Receive the Verification Email
After changing the Apple ID, Apple will send you an email to confirm your identity for safety reasons. However, you might not successfully receive the email. We offer the following solutions:
Check your email box: The most possible reason is that the email is regarded as spam, and be removed in the Junk, or Bin. Additionally, you can also check the folders.
Check your email account: Make sure you are looking through your primary email inbox or the additional email account for notifications.
Send the email again: Go back to the Apple ID changing page and resend the verification email.
Advanced Tips: How to Change Apple ID Password?
On iPhone or iPad: Go to Settings > Your Name > Sign-In & Security and select “Change Password”. After entering your old login credentials to confirm your identity, now you can fill in the new Apple ID password.
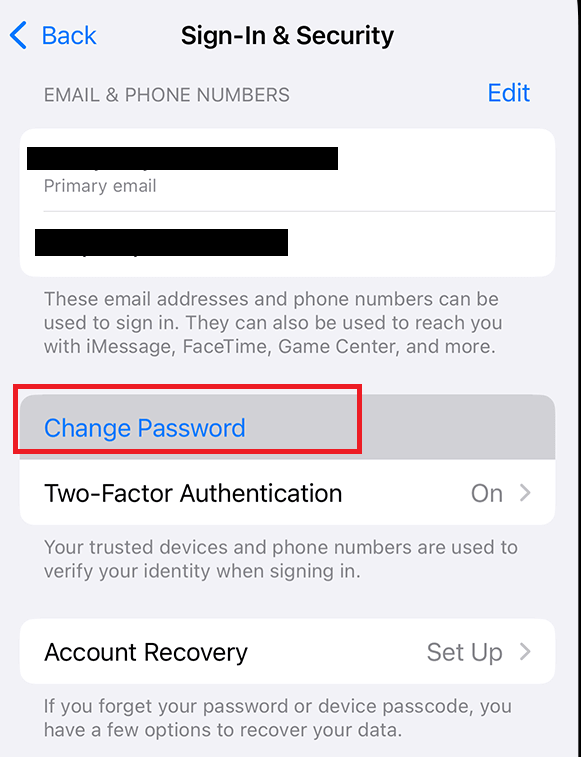
On Mac: Tap Apple menu > System Settings > Your Name, and press Sign-In & Security. Choose “Change Password” and enter the new password.
On Browser: Go to account.apple.com. and click Sign-In & Security > Change Password.
Conclusion
Now you have learned how to change your Apple ID on different devices. Don’t hesitate, why not try out these easy steps immediately?


