How to protect your online network? The most effective way is to change your IP address. How to change your IP address?
This article will recommend 6 ways to change your IP address, including using a VPN, Tor browser, proxy server, etc.
Whether you want to access global content or improve your online security, there is a method suitable for you.
What is My IP Address?

An IP address is like your digital home address on the Internet. It is a unique string of numbers assigned to your device by your Internet Service Provider (ISP), allowing it to communicate with other devices online.
When you type a website name into your browser, your computer converts it into an IP address to find and load the website.
Your IP address, which may change depending on your connection and network, provides general information about your location, such as your city or country, but not your exact address.
How to Change Your IP Address?
1. How to Change Your IP Address Using a VPN?
Can a VPN change your IP address? It can! Not only does a VPN help you change your IP address, but it also allows you to switch to an IP from around the world, such as the United States, Australia, Japan, and more.
If your VPN provider has servers in different countries, you can easily connect to those servers and get an IP address from that country.

LightningX VPN is the safest way to change your IP address. Connect to over 2,000 servers worldwide with one click, unlimited traffic, and unlimited speed. Its powerful encryption technology effectively protects your online privacy. Download LightningX VPN now and try it for 7 days for free.
Here’s how you can change your IP address using LightningX VPN:
Step 1: Go to the LightningX VPN website, Create a secure password, and choose the subscription plan.
Step 2: Download LightningX VPN
- Click the “Get LightningX VPN” button.
- Download and install the LightningX VPN app on your computer.
Step 3: Use LightningX VPN
- Open the LightningX VPN and Log in.
- Use the one-click connect feature for quick access to the internet, or choose your preferred server location from the list.
With LightningX VPN, you can enjoy a secure, stable, fast Internet experience in just a few simple steps. Change your IP address and access content from around the world!
2. How to Change Your IP Address Using the Tor Browser?
Tor Browser, often called “Tor,” is a privacy-focused browser. It makes it difficult for anyone to track your online activities and allows you to change your IP address easily.
If this is your first time using Tor, it will automatically connect you to the server and assign you a new IP address.
- Step 1: Download the Tor Browser
- Step 2: Install the Tor Browser
- Step 3: Start Using the Tor Browser: Open the Tor Browser after installation. It will automatically connect to the Tor network.
- Step 4: Browse Safely: Once connected, you can browse the web.
Bonus Tip: Change Your IP Address
If you’ve already been using Tor and want a new IP.
- Click the three horizontal lines at the browser’s top-right corner and select “New Identity.” A prompt will inform you that Tor needs to close all windows and tabs.
- Confirm and restart the browser to get a new IP address.
3. Change Your IP Address Using a Proxy Server
Using a proxy server is another great way to change your IP address.
- Step 1: Click on the Wi-Fi icon at the bottom right of your computer screen.
- Step 2: Select “Network & Internet Settings” and click “Proxy.”
- Step 3: Turn on the switch for “Automatically detect settings.”
- Step 4: Enter the script address on the “Use setup script” switch.
- Step 5: A proxy server works similarly to a VPN or Tor. However, proxies don’t encrypt your connection, so they may be less secure.
4. Change Your IP Address by Unplugging Your Router
Another simple method is to unplug your router. Most of the time, our IP addresses are dynamically assigned, meaning they change periodically. Here’s how you do it:
Step 1: Disconnect the power to your modem or router.
Step 2: Be patient and wait a few minutes.
Step 3: Plug the power back in and restart your modem or router.
The idea is to force your device to get a new IP address when it reconnects. However, there’s no guarantee you’ll get a completely new IP address every time.
5. Change Your IP Address by Switching to Mobile Data
Looking for the quickest way to change your IP address? Try switching to your mobile network:
Step 1: Turn off the Wi-Fi connection.
Step 2: Turn On Mobile Data
That’s it! Just take just two steps, and your IP address will change. If you’re reading this, give it a try right now.
Tip: While this will change your IP address, it won’t make you completely anonymous. Your mobile network provider still knows your identity. If you want more advanced privacy protection, consider other methods, such as a VPN.
6. Manually Change Your IP Address
Change Your IP Address on Windows

- Click on the Start menu and open “Settings.”
- Select “Network & Internet.”
- Pick “Wi-Fi” or “Ethernet,” depending on your connection.
- Click on “IP assignment.”
- Choose “Manual” and enter your new IP address.
Change Your IP Address on Mac

- Click the Apple icon in the top-left corner and go to “System Preferences.”
- Select “Network” and find your network service.
- Click “Advanced,” then go to the “TCP/IP” tab.
- Choose “Manually” and enter your new IP address.
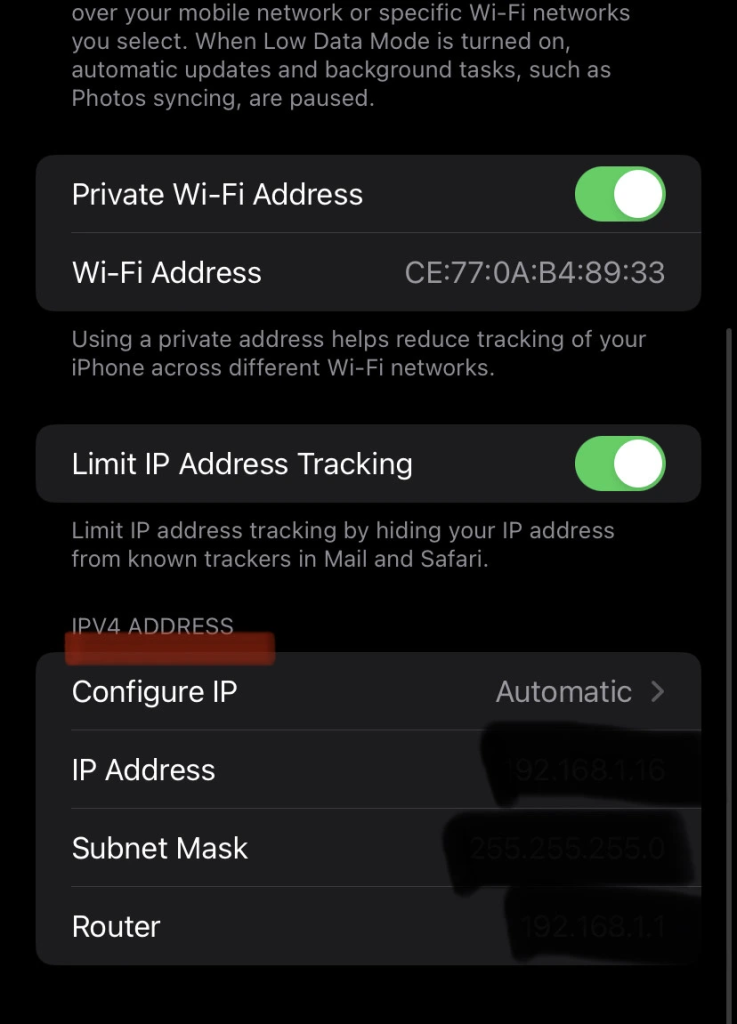
Change Your IP Address on iPhone.

- Go to “Settings” and tap on “Wi-Fi.”
- Tap the info icon next to your connected network.
- Select “Configure IP” and switch to “Manual.”
- Input your desired IP address.
Change Your IP Address on Android

- Go to “Settings” and tap on “Wi-Fi.”
- Long-press your connected network and select “Modify network.”
- Choose “Static” and enter your new IP address.
While manually changing your IP address is convenient, using a VPN is a better option to protect your privacy and browse safely.
Change Your IP Address without VPN
1. How to Change IP Address on Android
- Go to your phone’s “Settings.”
- Find and tap on “Connections.”
- Tap on “Wi-Fi” and choose the network you’re connected to.
- Tap the gear-shaped icon next to your network.
- Scroll down and tap “Advanced.”
- Tap “IP Settings” and select “Static.”
That’s it! You’ve manually changed your IP address on Android.
2. How to Change IP Address on iPhone
- Go to “Settings” on your device.
- Select “Wi-Fi.”
- Tap on the network you’re connected to.
- Tap the “i” icon next to your network.
- Under the IPv4 Address section, tap “Configure IP.”
- Select “Manual.”
- Type in the new IP address you want to use.
Why Do People Change IP Address?
Why do you need to change your IP address? Here are a few key reasons:
- Prevent personal information leakage and reduce the risk of being tracked by websites and targeted by ads.
- Access websites, streaming services or online platforms that are blocked based on your location.
- Changing your IP address regularly can make it more difficult for criminals to collect your personal information through your IP address.
All in all, changing your IP address is a great way to maintain online privacy, enhance security, bypass geo-restrictions, and remain anonymous.
How Do You Check If the IP Address Has Changed?
Want to know if your IP address has successfully changed? Here’s a simple step-by-step guide:
- Check Your Current IP Address: You can do this by Googling “What’s my IP address” or using any online IP lookup tool.
- Connect to a VPN: Turn on your VPN service, like LightningX VPN, and connect to a server of your choice.
- Recheck Your IP Address: Repeat the first step after connecting to the VPN and check your IP address.
- Compare IP Addresses: Compare the IP address before and after connecting to the VPN. If the IP address changes, you’ve successfully switched your IP using the VPN.
FAQ about Change IP Address
1. Can Free VPNs Change Your IP Address?
Yes, free VPNs can change your IP address, but they have some limitations and risks:
- Free VPNs may log your data and sell it to third parties.
- Free VPNs may not be able to access some geo-restricted streaming content.
- Free VPNs usually offer a smaller selection of servers.
- Free VPNs contain ads to make money.
Read more: Are Free VPN Safe? 5 Risks You Need to Know!
2. Will My IP Address Change When I Use a VPN?
Yes, a VPN means connecting to another web server, which will change your IP address.


