


The scheduled message sending feature on the iPhone is very useful. Enabling the feature helps you send important messages on time, such as expressing your love on your wedding anniversary or sending birthday wishes to others. If you don’t know how to schedule a text on an iPhone, you’ve come to the right place. Keep reading this post, you’ll get what you want.
What to Know About Scheduling a Text Message on iPhone
All iOS versions allow you to set scheduled messages. However, there are some limitations. In iOS 18 and later versions, scheduled messages can be sent directly via iMessage. In earlier versions, including iOS 13 to iOS 17, you need to use the Shortcuts app to complete the operation. iOS 13 and earlier versions do not have a native Shortcuts app, which means you also need to download one from the App Store on your device.
Related: Top iOS 18 Features You Should Know (Practical, Interesting)
How to Schedule a Text Message on iPhone Using iMessage
Here’s how to schedule an iMessage text on iOS 18. However, note that you can only send a pre-text within the next 14 days.
Step 1. Open the Messages app on your iPhone.
Step 2. Tap “+” next to the send box. A menu will open.
Step 3. Choose “Send Later” from the menu.
Step 4. Tap the small box that appears above the send box and set up the time for sending the message.

Step 5. Type your message in the box and press the send button. The scheduled message will appear with a dotted border and be sent at the time you just set up.
To reschedule or delete the automated message, simply long-press on it and choose “Edit” or “Delete”.
How to Schedule a Text on iPhone Using the Shortcuts App
If your iPhone is under iOS 18, you can use the Shortcuts app to set up an automated text. This method has no time limit for scheduling a text.
Here’s how to schedule an automated message using the Shortcuts app.
Step 1. Open the Shortcuts app on your iPhone. If your iPhone is under iOS 13, first download the Shortcuts app from the App Store.
Step 2. Choose the “Automation” tab at the bottom middle of the app.
Step 3. Tap the “+” icon at the top right. Tap “New Automation” if you create a shortcut for the first time.
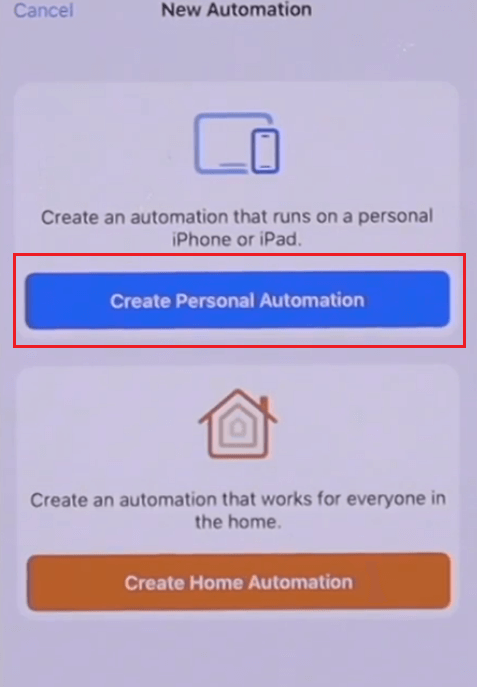
Step 4. Choose “Create Personal Automation” > “Time of Day”.
Step 5. Set up the time you want to send the message and tap “Next” in the top right.
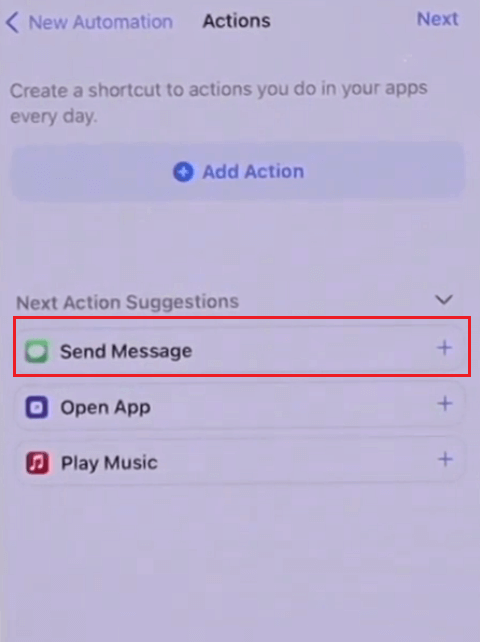
Step 6. Choose “Send Message” under “Next Action Suggestions”. A new editing page will pop up.
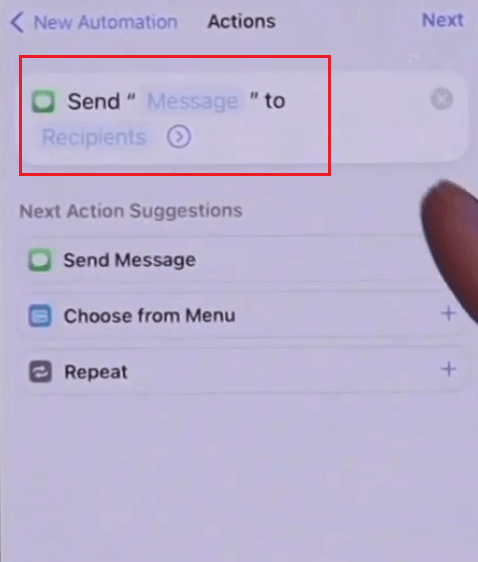
Step 7. Edit your message and tap “Next” in the top right. Tap “Message” to type your message. Tap “Recipients” to select the recipients you want to send your text to.
Step 8. There’s a “Ask Before Running” toggle. If you turn it on, the message will be sent after gaining your confirmation.
Step 9. Tap “Done” to save the automation. The text will be automatically sent at the time and date you set up. You can see the message in the “Automation” tab of the Shortcuts app.
To delete the scheduled message, you can swipe left on the message and then tap “Delete.” To edit it, simply tap on it to change the time and the text content.
Note: You can also choose to download iOS 18 on your older iPhone to use iMessage for automation.
How to Schedule a Text Message on iPhone Using a Third-Party App
Although iPhone’s native Messages app doesn’t support true automatic scheduling for apps like WhatsApp, you can use third-party apps like Scheduled, Moxy Messenger, or Text Timer to set reminders for sending texts. These apps let you compose your message and choose a send time, then notify you when it’s time to send. Due to iOS restrictions, you’ll still need to manually confirm and send the message when prompted.
Among these, Scheduled is the most popular and user-friendly app, offering free features with optional premium upgrades. Moxy Messenger also supports both SMS and iMessage scheduling, while Text Timer is a simple, no-frills option for quick scheduling.
Tip: While these apps help with convenience, privacy is also a growing concern when messaging online. To add an extra layer of security to your iPhone, try using a VPN for iPhone. LightningX VPN is one of the best VPNs for phones. It uses the best protocols based on top-grade algorithms. It offers 2,000+ servers in 70+ countries to let you unblock movies and games from anywhere. It provides unlimited bandwidth and speed. You can download it for a traditional free trial.
How to Schedule WhatsApp Messages on iPhone?
While you can use the Shortcuts app on an iPhone to prepare and schedule a WhatsApp message, Apple’s privacy and security policies prevent any app—including Shortcuts—from automatically sending messages through third-party platforms like WhatsApp. As a result, although the message can be composed and scheduled in advance, you’ll still need to manually confirm and send it when the time comes.
Here’s how to do so.
- Open Shortcuts on your iPhone. If your iPhone doesn’t have the app, download one from the App Store.
- Tap the “Automation” tab at the bottom.
- Tap “New Automation” or “+” at the top right. The “New Automation” appears if you create automation for the first time.
- Select “Create Personal Automation” > “Time of Day”.
- Set up the time for sending a message and tap “Next” in the upper right.
- Tap “+ Add Action” and search for WhatsApp.
- Type the message and enter the recipients, and tap “Done”. Now the WhatsApp message is successfully timed. You can check it in the “Automation” tab.
- When the time comes, a notification will show up, asking you to tap on a button to send the WhatsApp message.
To delete the message, swipe left on it and tap “Delete”. To edit it, simply tap on it.
Summary
It is simple to schedule a text on an iPhone. If your system is iOS 18 or higher, directly set up the pre-text in the iMessage app. However, if your iPhone is under iOS 18, use the Shortcuts app or a third-party app to set up an automated message. The Shortcuts app even allows you to schedule a WhatsApp message.


