


Among many smartphones, iPhones stand out for their user-friendly interface, security features, and advanced technology. One such feature is the ability to track iPhone location history.
In this article, we will walk you through the process of checking your iPhone location history. We will cover why it matters, how it can benefit you, and the exact steps to access this information.
How to Check Location History Using Your iPhone’s Settings?
The easiest way to view your iPhone location history is through the device’s settings. Here’s how to do it:
Step 1: Open the Settings App
First, go to your iPhone’s home screen and tap on the Settings icon. This app is where you control all aspects of your iPhone.
Step 2: Scroll down and select “Privacy & Security.”
In the Settings menu, scroll down until you see the option called “Privacy & Security.” Tap on this to proceed.
Step 3: Choose “Location Services”
Under Privacy & Security, you’ll find a section called “Location Services.” Tap on it to access your location-related settings.
Step 4: Tap “System Services” at the bottom
Scroll down within the Location Services menu and tap on “System Services.” This section manages how your phone uses location data for system-related services.
Step 5: Select “Significant Locations”
In the System Services menu, you will see an option called “Significant Locations.” This is where your iPhone tracks places you frequently visit. Tap on it to continue.
Step 6: Authenticate with Face ID, Touch ID, or Passcode
For privacy reasons, Apple protects your location history with a layer of security. You will need to authenticate using Face ID, Touch ID, or your passcode to view your significant locations.
Step 7: View your iPhone location history
After authentication, you’ll be able to see a list of cities or regions you’ve visited. Tapping on any location will give you more details, including specific addresses and the dates and times of your visits.
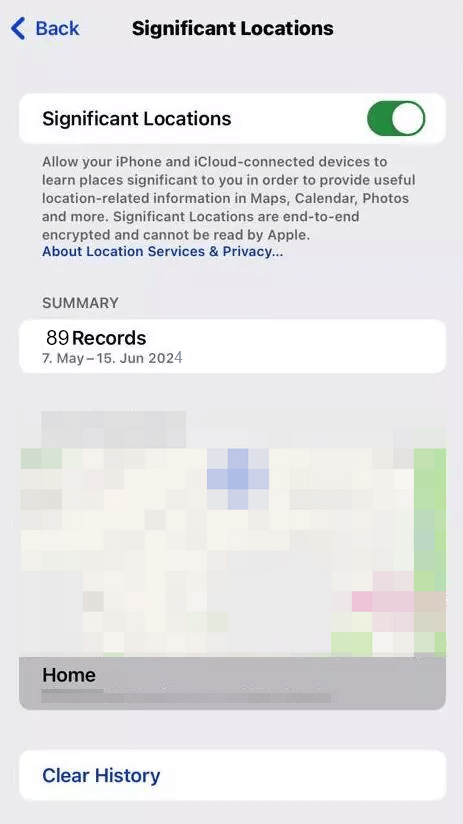
It’s important to note that Apple only keeps a record of significant locations, meaning places you visit frequently or stay at for a certain amount of time. If you were somewhere for only a brief moment, it might not appear in this list.
How to View Your iPhone Location History Using Apple Maps
Another way to check your location history is through Apple Maps. Apple Maps keeps track of the places you’ve searched for or navigated to. Here’s how to access that information:
- Open Apple Maps: Go to your home screen and open the Apple Maps app. This app is the default map service on all iPhones.
- Swipe up on the Apple Maps interface: Once the app is open, swipe up from the bottom of the screen to reveal a menu with various options.
- View your “Recents” and “Favorites”: In this menu, you’ll see two sections: “Recents” and “Favorites.” Under “Recents,” you’ll find the places you’ve recently searched for or navigated to. If you frequently visit a location and have saved it as a favorite, it will appear under the “Favorites” section.
Apple Maps’ location history is not as detailed as the Significant Locations feature in Settings. However, it can still provide a useful record of your recent travels.
How to View iPhone Location History Using Google Maps
You can also view your location history through the Google Maps app.
Google Maps provides a more comprehensive and detailed history of your travels, even more so than Apple’s native apps.
Here’s how to view your location history using Google Maps:
- Open the Google Maps App: If you have Google Maps installed, open the app on your iPhone.
- Tap on your Profile icon: In the upper right corner of the screen, you’ll see your profile icon. Tap on it to access your account settings.
- Select “Your Timeline”: In the menu that appears, you’ll see an option called “Your Timeline.” This feature shows you a detailed history of where you’ve been. This includes locations, times, and routes taken.
- Explore your timeline: In the timeline view, you can explore specific dates to see where you were on a particular day, the routes you took, and how long you stayed at each location. Google Maps provides much more specific details than Apple’s location history.
Why Would You Want to View Your iPhone Location History?
There are several reasons you may want to access your iPhone’s location history. Here are some of the most common:
Tracking Your Movements
If you want to recall where you were on a specific day or check the places you’ve visited recently, your iPhone’s location history can provide a clear record of this information. If you use the internet while you are going around, it’s easy to find your location history via these digital footprints.
Safety Concerns
Some users are concerned about their safety or want to ensure that they’re aware of where they or their loved ones have been. Parents, for example, may want to check their child’s movements for safety reasons.
Finding a Lost Phone
If your iPhone is lost or stolen, checking its last known location can be extremely helpful in retrieving it. Knowing how to access your iPhone’s location history can provide you with clues about where your device might be.
Monitoring Data For Work or Health
Some people like to keep a record of how much they’ve traveled, whether for health purposes (like tracking daily steps) or for work-related reasons (like travel for business).
Revisiting Favorite Places
Sometimes you might want to visit a restaurant, store, or location you visited in the past but can’t remember the exact name or address. Location history can help you find it easily.
However, accessing your location history can raise privacy concerns. As you regularly track your location, this information could be exposed to third parties, whether through apps or online services.
To prevent your data from being monitored by advertisers, hackers, or other third parties, using a reliable VPN like LightningX VPN is a smart solution.
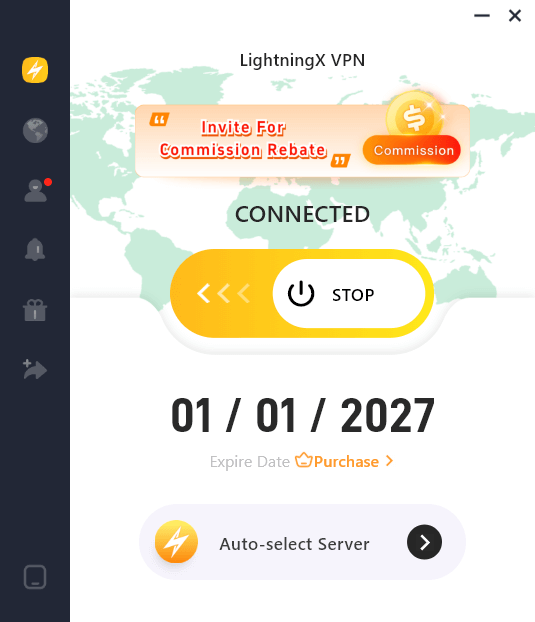
By encrypting your data and hiding your IP address, LightningX VPN keeps your personal information, including location history, secure. More than just a safeguard, it can open a fresh new world to you with 2000+ servers in no less than 70 countries, breaking down the geo-restrictions you faced before while surfing.
Bonus: Want to start using LightningX VPN from now? You are lucky to have a 30-day money-back guarantee!
Related article: How to Track a Cell Phone Location?
Managing Privacy and Security Concerns
While tracking your location history can be very useful, some people may have privacy concerns about their location being constantly recorded. If you’re one of those people, there are ways to manage or limit the data your iPhone collects.
- Turn off location services: If you don’t want your iPhone to track your location, you can disable Location Services entirely by going to Settings > Privacy & Security > Location Services and switching it off. Keep in mind that this will disable all location-based services, including GPS and maps.
- Clear your location history: If you want to delete your location history, go to the Significant Locations section (as explained earlier) and tap “Clear History.” This will remove all recorded locations from your iPhone.
- Limit location access for specific Apps: Some apps request access to your location even when they don’t need it. You can manage which apps have access to your location by going to Settings > Privacy & Security > Location Services and adjusting the settings for each app.
FAQs – iPhone Location History
Q1: Why is my iPhone location history missing some places I’ve visited?
iPhone’s “Significant Locations” feature doesn’t track every single movement. It only records places you visit frequently or where you stay for a significant amount of time (like your office, home, or a favorite gym).
If you only stopped somewhere briefly, the system might not categorize it as a “significant” location. For a more minute-by-minute log, using Google Maps Timeline is a better alternative.
Q2: Can someone else see my iPhone location history remotely?
Generally, no. Apple encrypts this data end-to-end, and viewing “Significant Locations” requires Face ID, Touch ID, or your passcode on the physical device.
However, if someone knows your Apple ID and password, they might access your real-time location via “Find My.” To stay anonymous and prevent data tracking by third-party apps, using a VPN like LightningX VPN is highly recommended.
Q3: Does deleting my location history also delete it from Apple’s servers?
Yes. According to Apple, Significant Locations are end-to-end encrypted and cannot be read by Apple. When you tap “Clear History” in your System Services settings, those records are removed from your device and synced across your iCloud devices, effectively wiping them from the system.
Conclusion
Knowing how to view your iPhone location history is important for a variety of reasons. Whether you want to track your movements, ensure your safety, find a lost phone, or revisit a favorite spot, the location history feature is a valuable tool.
Following the steps outlined in this guide, you can easily access and manage your iPhone’s location history. Just be mindful of your privacy and security, and make adjustments as needed to protect your personal information.


