


Have you received a photo on the subway AirDropped by a you-know-who passenger? AirDrop is an incredibly convenient feature that lets you wirelessly share files between iPhones, iPads, and Macs. Whether you want to send photos, videos, documents, or even website links, this feature makes it quick and secure.
But if you’re new to AirDrop or curious about how to use it effectively, you may feel undirected. This article is for you to guide on how to Airdrop on iPhone/iPad/Mac. Check it below!
[Must-See] Prerequisite for AirDrop
AirDrop is one of Apple’s most useful tools, and many users love it. Before you start using it, it’s a good idea to make some preparations to reduce the chances of it failing.
- The device you’re sending to is nearby and can be covered by Bluetooth and Wi-Fi.
- Both of the devices (ready for AirDrop) have Wi-Fi and Bluetooth turned on.
- Both of the devices (ready for AirDrop) have AirDrop not in “Receiving Off” status and set to “Contacts Only” or “Everyone for 10 Minutes.”
You May Need: iPhone Not Connecting to WiFi? [Easy Fixes]
How to AirDrop? The Whole Process Tutorial
This full tutorial will show you how to use AirDrop, from turning it on to receiving it.
How to Turn on AirDrop
To use AirDrop, you first need to enable it on your device. Here’s how you can do it on your iPhone, iPad, or Mac.
Turn on AirDrop on iPhone or iPad
Step 1. Open the Control Center: Swipe down from the top-right corner of your screen (on iPhone X or later) or swipe up (on older models).
Step 2. Find the AirDrop Icon: Look for the AirDrop icon, which looks like a series of concentric circles. It’s usually in the network settings section (alongside Wi-Fi and Bluetooth).
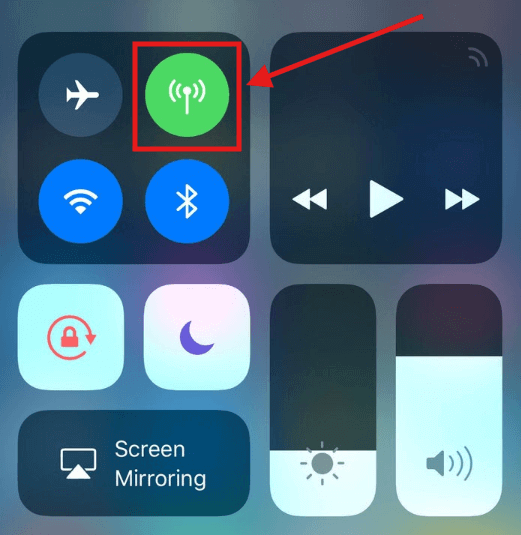
Step 3. Tap to enable: Tap the AirDrop icon and choose one of three options:
- Receiving Off: No one can send you files.
- Contacts Only: Only people in your Contacts list can see your device.
- Everyone: Anyone nearby with AirDrop enabled can see your device (great for quick sharing but less private).
Step 4. Turn on Wi-Fi and Bluetooth: AirDrop requires both to be enabled. If they’re off, you’ll be prompted to turn them on.
Turn on AirDrop on Mac
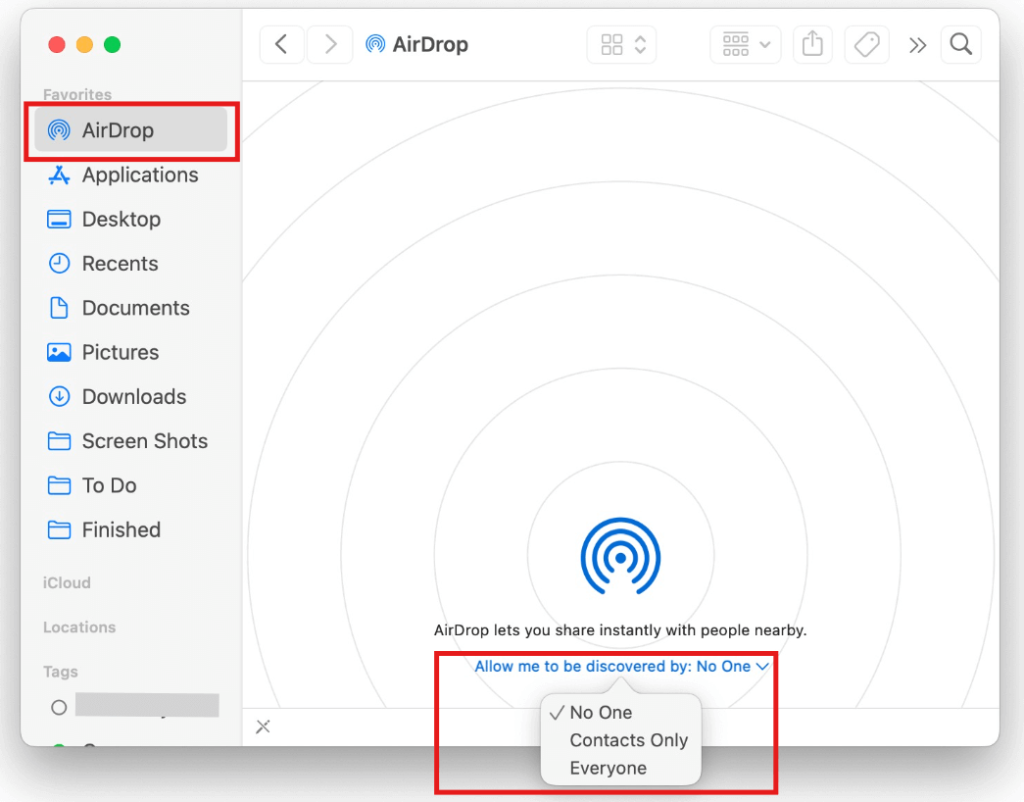
- Open Finder: Click on the Finder icon in your dock.
- Locate AirDrop: In the Finder sidebar, click on “AirDrop.” If you don’t see it, go to Finder > Preferences > Sidebar and check the box for AirDrop.
- Enable AirDrop: At the bottom of the AirDrop window, click the dropdown menu next to “Allow me to be discovered by” and select Contacts Only or Everyone.
- Check Wi-Fi and Bluetooth: Ensure both are turned on in your System Settings or menu bar.
Pro Tip: For security, stick with Contacts Only unless you’re in a public place and need to share with someone not in your contacts. You can always switch to Everyone temporarily.
How to AirDrop Photos, Videos, and Other Files
Now that AirDrop is enabled, let’s talk about how to share files via AirDrop. The process is similar across different types of files, but I’ll use photos as an example since it’s one of the most common uses.
AirDrop from iPhone or iPad
Step 1. Open the Photos app: Find the photo or video you want to share.
Step 2. Tap the Share button: Look for the share icon (a square with an upward arrow) in the bottom-left corner.

Step 3. Select AirDrop: In the share sheet, you’ll see a row of AirDrop-enabled devices nearby. Tap the name or profile picture of the recipient’s device.
Step 4. Wait for Acceptance: The recipient will get a pop-up asking to accept or decline the transfer. Once they accept, the file will transfer almost instantly.
Tips: You can select multiple photos or videos by tapping Select in the Photos app, choosing your files, and then following the same steps. This also works for other file types, like PDFs or notes. Just find the share button in the relevant app.
AirDrop from Mac
- Open Finder: Navigate to the file you want to share (e.g., a photo in your Pictures folder).
- Right-click the File: Select Share > AirDrop from the context menu.
- Choose a recipient: A window will pop up showing nearby AirDrop devices. Click the recipient’s name.
- Send the file: The recipient will need to accept the transfer, and the file will land in their Downloads folder (or another designated folder, depending on the file type).
Safety Tips:
No matter whether you are AirDropping files or transferring files from PC to PC, your files may be exposed to risks. How about encrypting the transferring tunnel to add an extra security layer?
LightningX VPN can help you out. It uses advanced encryption algorithms and protocols to protect your traffic (Shadowsocks, Vless, and WireGuard, AES-256-GCM and ChaCha20-Poly1305). It’s very easy to download and set up. Click the download button below, and you’ll have another safety defender! A 30-day money-back guarantee lets you try risk-free!
How to Receive AirDrop Files
Receiving files via AirDrop is straightforward, but you need to know what to expect.
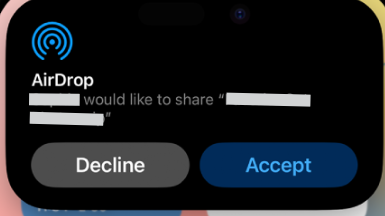
- On iPhone/iPad: When someone sends you a file, you’ll see a pop-up with a preview of the file and options to Accept or Decline. If you accept, the file will open in the relevant app (e.g., Photos, Files). If you decline, the transfer is canceled.
- On Mac: A notification will appear, asking if you want to Accept, Decline, or Save and Open. Choose Accept to save the file to your Downloads folder.
If you don’t see the AirDrop prompt, double-check that AirDrop is enabled and that your device is discoverable (not set to Receiving Off).
How to AirDrop from iPhone to Mac (and Vice Versa)
One of AirDrop’s best features is its ability to bridge the gap between your iPhone and Mac. Here’s how to make it happen.
AirDrop from iPhone to Mac
- Enable AirDrop on both devices (referring to the above steps).
- Select the file on Your iPhone: For example, go to the Photos app, tap the share button, and choose your Mac’s name from the AirDrop section.
- Accept on your Mac: Your Mac will show a notification asking if you want to accept the file. Click Accept, and the file will save to your Downloads folder.
AirDrop from Mac to iPhone
- Open AirDrop on your Mac: In Finder, go to the AirDrop section.
- Drag and drop: Drag the file you want to share onto your iPhone’s name in the AirDrop window.
- Accept on your iPhone: Your iPhone will display a prompt to accept the file. Tap Accept, and the file will appear in the appropriate app (e.g., Photos for images, Files for documents).
Troubleshooting Common AirDrop Issues
Even with AirDrop’s simplicity, you might run into hiccups. Here are some common problems and how to fix them:
- Devices not showing up: Ensure both devices have Wi-Fi and Bluetooth turned on and are within 30 feet of each other. Restarting both devices can also help.
- AirDrop not working: Check that neither device is in Airplane Mode or has Personal Hotspot enabled, as these can interfere with AirDrop. Also, ensure both devices are updated to the latest iOS or macOS version. (Check our guide: How to Update iPhone? Complete Guide)
- Slow transfers: For large files, transfers might take a moment. Make sure the devices stay close during the process.
- Security concerns: If you’re in a crowded place, set AirDrop to Contacts Only to avoid unwanted transfer requests.
FAQs – How to AirDrop
Q1. How to change AirDrop name?
- On iPhone/iPad: Go to Settings > General > About > Name, tap the name, and enter a new one.
- On Mac: Go to System Settings > General > About, click the Name field, and type a new name.
Q2. How to see AirDrop history?
AirDrop doesn’t store a visible history of transfers. Files you receive are saved to the relevant app (e.g., Photos, Files) or Downloads folder on Mac, but there’s no dedicated log or history view.
Q3. Can I AirDrop to Android?
No, AirDrop is exclusive to Apple devices. For Android, try alternatives like Nearby Share, Bluetooth, or apps like Snapchat or Google Drive.
Q4. Can I AirDrop between an iPhone and a Windows PC?
No, AirDrop doesn’t work with Windows PCs. Instead, use cloud services (e.g., iCloud, Google Drive), email, or USB transfer to share files.


