


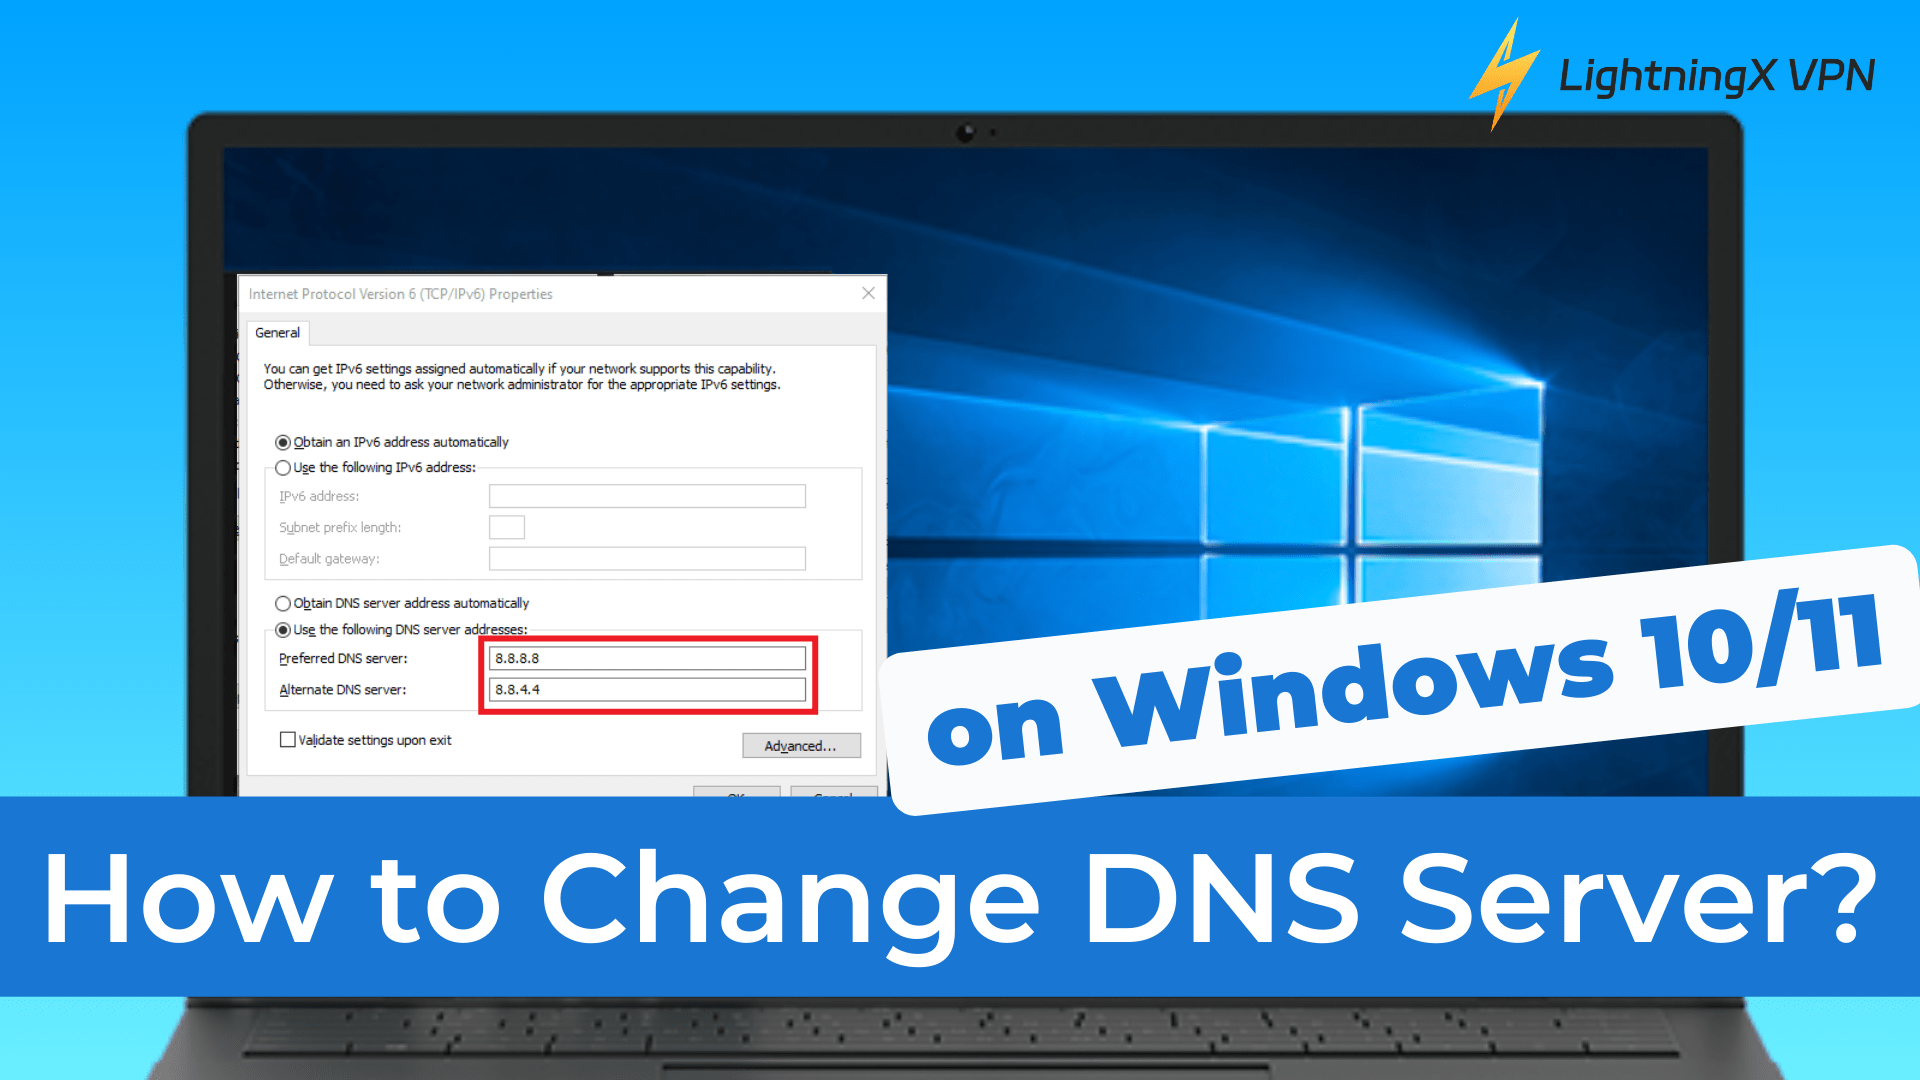
Many Windows users are unaware that their default DNS server can affect browsing speed, privacy, and even security. So, how to change DNS server on Windows?
In this guide, we’ll show you the steps to change your DNS server on Windows 10 and Windows 11. You’ll also learn why switching to a third-party DNS server can improve your online experience.
What is My DNS Server?
DNS, also known as the Domain Name System, is like the Internet’s phone book.
When you want to visit a website, you usually type in a domain name, such as lightningxvpn.com. The DNS translates this domain name into an IP address that your browser can understand and access the website.
So, what does a DNS server do?
The servers that make Internet requests don’t understand domain names like “lightningxvpn.com”; they only appreciate numeric IP addresses like 104.17.101.99 or the longer modern IPv6 addresses.
Once you understand how DNS works, it becomes much easier to see why learning how to change DNS server settings can improve speed, privacy, and reliability.
How to Change DNS Server on Windows 10?
Now that you know what a DNS server does, let’s walk through how to change your DNS server on Windows 10.
Step 1: Open Network Settings
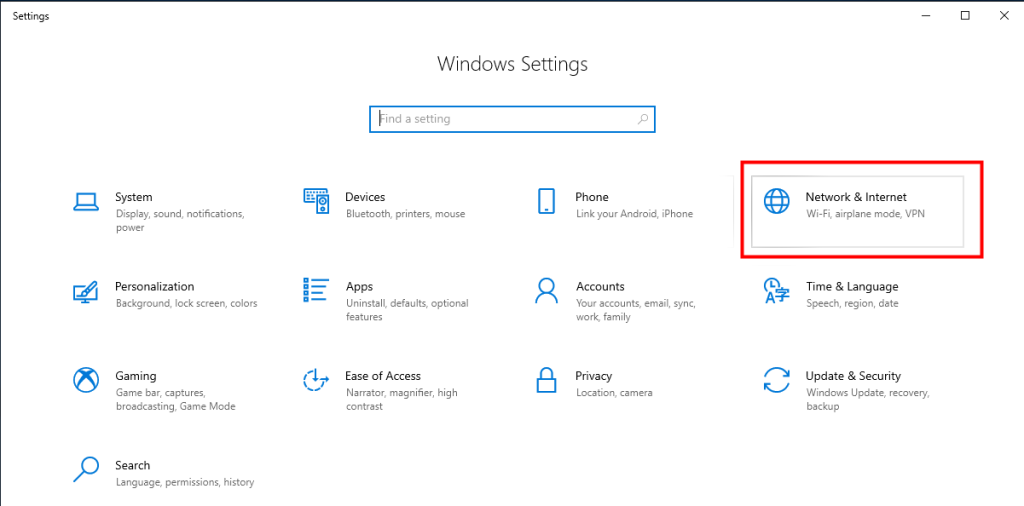
Click the “Start” menu and select the “Settings” icon. From there, choose “Network & Internet”.
Step 2: Open Adapter Options

Scroll down to “Change your network settings”, then click “Change adapter options”.
Tip: If you don’t see this option right away, click “Status” in the left-hand menu first.
Step 3: Open Your Connection Properties
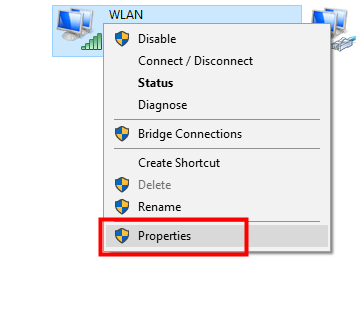
Right-click the active connection (WiFi or Ethernet) you want to change, and then select “Properties”.
Step 4: Edit IPv4 Settings
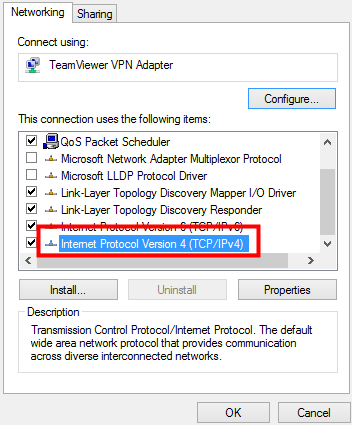
In the list, scroll down and double-click “Internet Protocol Version 4 (TCP/IPv4)”.
Step 5: Enter New DNS Server Addresses
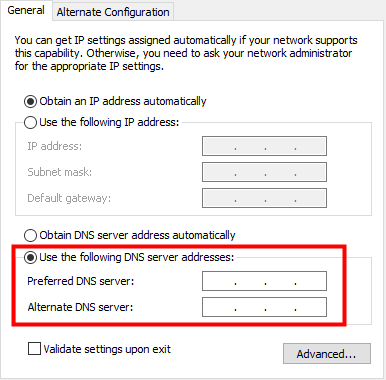
Select “Use the following DNS server addresses”. Enter your preferred DNS server in the first field, and an optional secondary DNS server in the second field. Once done, click “OK” to save your changes.
That’s it! You’ve successfully learned how to change DNS server settings on Windows 10. The new DNS server will start working immediately and may help improve browsing speed, security, or access to certain websites.
Which DNS Server Addresses Can You Use?
Here are some best DNS server addresses you can choose:
1. Google Public DNS:
Primary DNS: 8.8.8.8
Secondary DNS: 8.8.4.4
2. Cloudflare DNS:
Primary DNS: 1.1.1.1
Secondary DNS: 1.0.0.1
3. OpenDNS:
Primary DNS: 208.67.222.222
Secondary DNS: 208.67.220.220
Related: Fix DNS Server Not Responding Windows 10/11, Mac, PS5/PS4, Xbox
How to Change DNS Server on Windows 11?
If you’re using Windows 11, changing your DNS server is quick. Below is a simple step-by-step guide that shows how to change DNS server settings on Windows 11 in just a few minutes.
Step 1: Open Advanced Network Settings
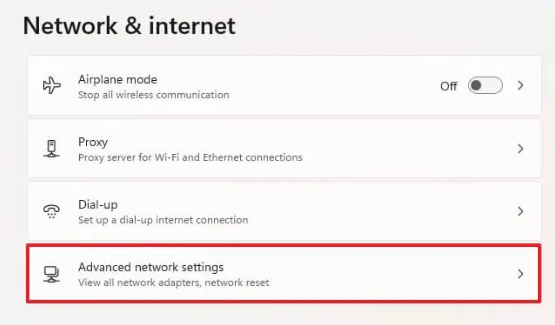
Click the “Start” menu and open “Settings”. Go to “Network & Internet”, then select “Advanced network settings”.
Step 2: View Network Properties
- Select the type of connection you want to modify (Ethernet or Wi-Fi).
- Click View additional properties.
Step 3: Edit DNS Server Settings
- Find the DNS server assignment section in the Properties screen and click the Edit button.
- In the Edit DNS settings window, change the drop-down menu from Automatic (DHCP) to Manual.
Step 4: Enable IPv4 and Enter DNS Addresses
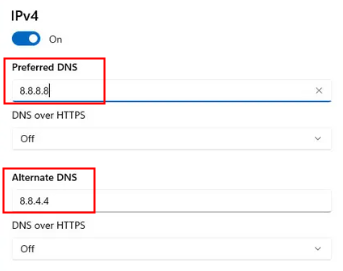
- Enter the preferred and alternate DNS server addresses in the corresponding fields.
- Click Save to apply the changes.
That’s all it takes. You’ve now learned how to change DNS server on Windows 11, which can help improve browsing speed, security, and access to certain websites.
In addition to changing your DNS server to improve security and performance, you can also protect your online activity with a VPN.
LightningX VPN uses advanced encryption protocols to ensure your data remains private and secure. With fast and stable servers in over 70 countries, it allows you to enjoy smooth browsing, streaming, and downloading without worrying about slow speeds.
Download it now to enjoy free nodes and a 30-day money-back guarantee.
Why Should You Change Your DNS Server?
Now that you know how to change your DNS server, you might be wondering why it’s worth doing. Here are several reasons why many users choose to change their DNS servers:
1. Faster Browsing Speed
The default DNS servers provided by your Internet Service Provider (ISP) aren’t always the fastest option. Switching to a faster, more reliable DNS server can reduce these delays and make your browsing experience smoother.
2. Better Privacy Protection
Many DNS servers provided by ISPs don’t prioritize user privacy and may even track your browsing activity.
Using a third-party DNS provider often offers better privacy protection and reduces unnecessary redirects.
3. More Reliable Caching
Third-party DNS servers typically have larger networks and better caching systems. This allows them to resolve domain names faster and more reliably.
Should You Change the IPv6 Address?
You may find both IPv4 and IPv6 when you change your DNS service. So, should you change your IPv6 address at the same time?
As IPv4 addresses run out, the Internet transition from IPv4 to IPv6 is becoming increasingly common. But there are some important points you need to pay attention to:
- IPv6 provides a larger range of available addresses compared to IPv4.
- Most ISPs either do not support IPv6 yet or are still in the testing phase.
- To see if your ISP supports IPv6, visit the Test-IPv6 website. This will show you if your current connection is compatible with IPv6.
Final Thought
That’s it! Whether you’re using Windows 10 or Windows 11, changing your DNS server settings can transform your internet experience.
Now, you can switch to a third-party DNS server to enjoy faster browsing speeds.


