


Has your computer been running slower lately? Or does your browser keep crashing? It sounds like you might need to remove your cache. Excessive cache can lead to various issues.
Whether you want to solve glitch problems or just free up some storage space, this blog includes everything you need. Especially for Windows users, here we will offer a step-by-step guide about how to clear the cache on your computer.
How to Clear Cache on Windows 10/11?
Apart from erasing the cache on your browser, you can still use some built-in features on Windows.
Clear the Location Cache
To offer location-oriented services, some apps might collect information about your position. These data are also stored in your computer, follow our instructions to remove them:
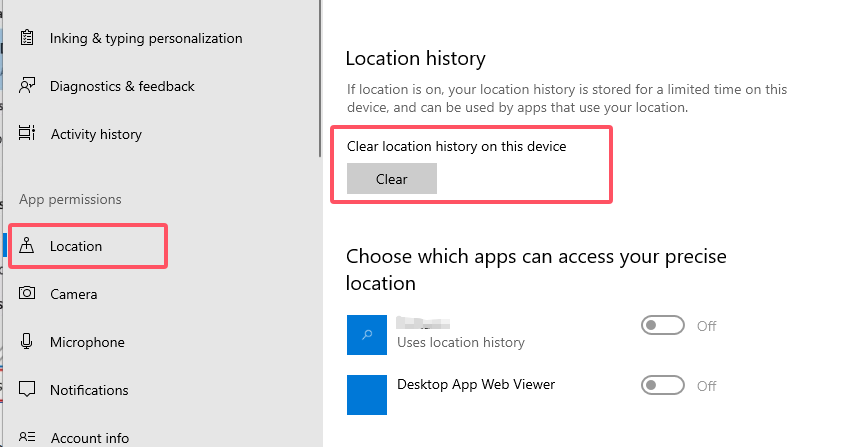
- Go to “Settings” and choose the “Privacy” option.
- Under the “App permissions” section, scroll down and navigate to “Location”.
- Click “Clear” to delete all the location history on this device. In addition, for your privacy and safety, you can also decide which apps can access your specific location.
Delete Temporary Files Via Disk Cleanup
Disk Cleanup is a very convenient feature in the Windows system. You can use it to check how much space you can recover on the operating system drive (C:). If an SSD (solid-state drive) is installed on your PC, you can also choose to scan it.
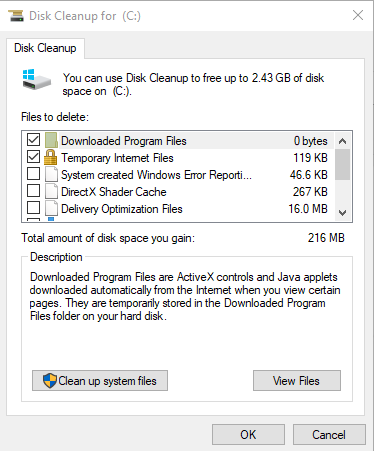
- Go to the search bar on the bottom and type Disk Cleanup.
- Once you open it, it will automatically determine the available space for cleanup.
- Scroll down and select “Temporary Files”. Besides, you can also choose other options like Downloads or Recycle Bin. Before you delete them, it’s better to check them to see whether you have backed up the important files.
- When you are ready, just press OK. Click “Delete Files” to confirm the deletion. Now, all the data will be successfully removed.
Flush DNS Cache
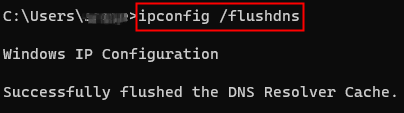
Furthermore, you can also clear the PC cache via the command prompt. To flush the DNS cache, type CMD in the search bar and click “Run as administrator”. Enter the command: ipconfig /flushDNS. Then you will receive a message that the DNS cache has been successfully flushed.
Remove the Microsoft Store Cache
When you browse the store and plan to download some apps, their icon, and other data can also be saved. To clear them, press the Windows+R key simultaneously to open the Run Dialog Box first. Type WSReset.exe and tap OK. A black window will show up and delete the store cache automatically. All you need to do is wait patiently until it is finished.
Tip:
Clearing the cache periodically can improve your browsing speed. Besides, you can also connect to LightningX VPN. It can offer a lightning-fast speed while you access content not available in your region. With no speed limits, LightningX VPN provides 2000+ servers across nearly 50+ countries.
Moreover, it can secure your data with strong encryption and a strict zero-log policy. You can download it on Windows/macOS/Linux/Android/Apple TV. It also offers a 7-day free trial, you can try it first!
How to Clear Browser Cache on Computer?
Especially when you browse some websites, your browser will save some information to help load faster. Over time, stored cache might result in lagging or unexpected browser crashes. So it’s better to delete them regularly. In addition, if you want to remove browser cache on Mac, please read this blog: How to Clear Cache on Mac: Step-by-Step Guide.
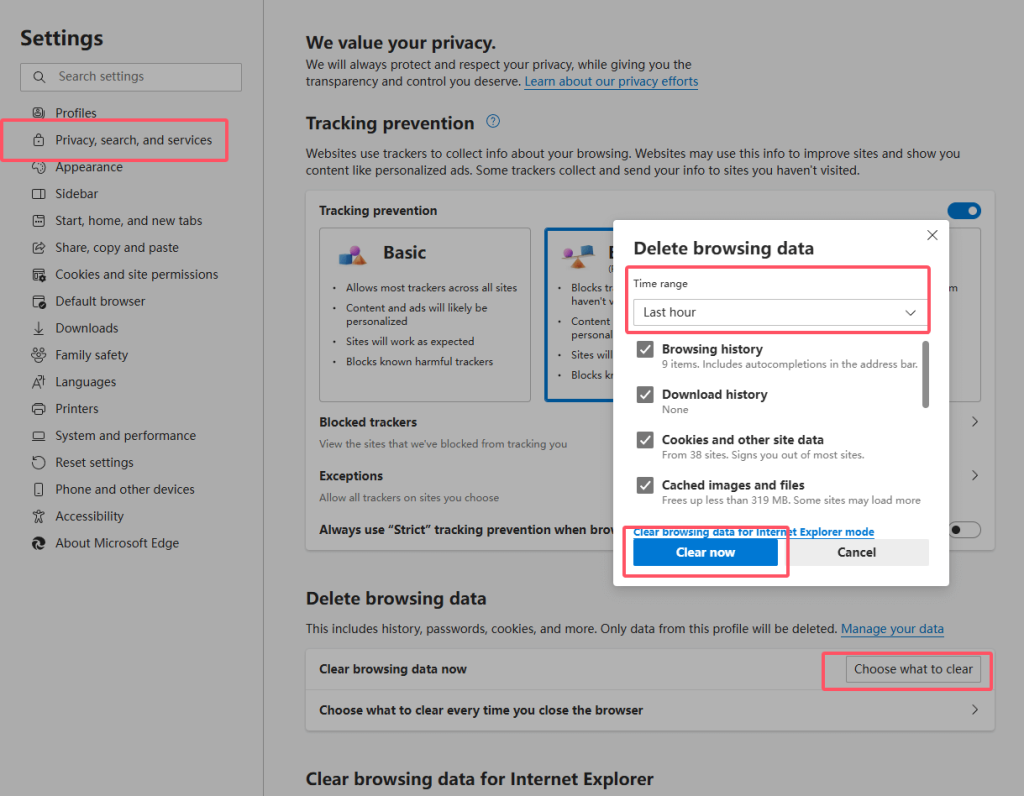
Delete Cache in Microsoft Edge
To clear the cache in Edge, you can press the three-dot icon on the top-right corner and go to Settings > Privacy, Search, and Services > Clear browsing data. Now you can select a time range and the data you want to delete. Once you are ready, tap “Clear Now”.
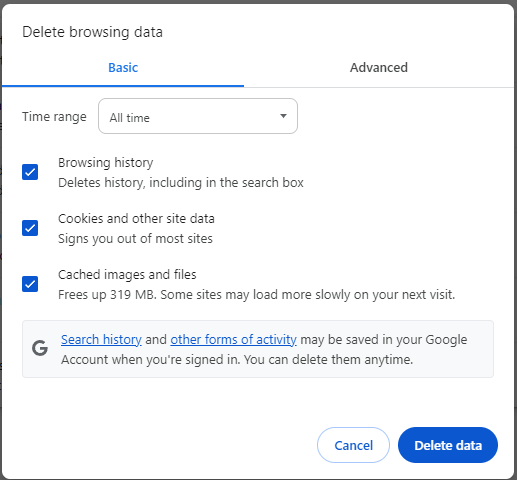
Delete Cache in Google Chrome
Hit the three-dot icon in the navigation bar and press “Delete browsing data”. Tick the checkbox to choose the information you want to erase. Then you can specify a duration and tap “Delete Data” to clear the cache on Chrome.
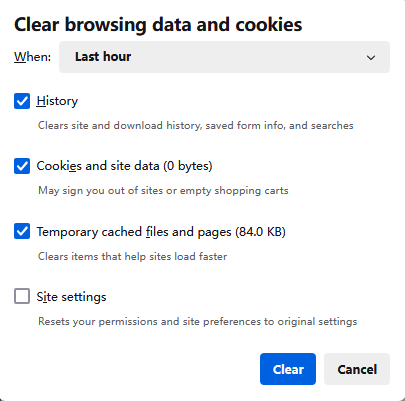
Delete Cache in Firefox
Click the ☰ button and navigate to Settings > Privacy & Security > Clear Data. To remove the cache at all times, you can select all and press “Clear”.
Why Should You Clear the Cache on PC?
- Except for uninstalling apps, removing the cache and cookies can also make more room for your storage capacity.
- Resolve website loading problems like shutdown or slow response, it will improve the loading speed.
- It can protect your online privacy. The website you visit usually requires your sensitive information.
- Keep your upgrade to the latest version of an app or a webpage, ensuring you access the new content.
FAQs – How to Clear Cache on Computer
Q: How do I empty the cache on my computer?
Generally, you can open your browser and go to Settings > Privacy > Clear Cache or Cookies (Different browsers normally follow similar steps). In addition, you can follow our above tutorial to clear location data, app cache, and temporary files. It can also free up a lot of space.
Q: Should you clear the cache on your computer?
The answer is yes. The accumulated cache could slow down your computer performance, or lead to a website not loading. Removing it can fix some browser crashing issues and clear up storage space.
Q: How do I clear my cache fast?
You can launch the Diskup Cleanup feature on the Windows 11/10. Type it in the search bar and choose the items you want to delete. Then press “Delete Files” to remove them all. Apart from that, you can also download some third-party apps to scan your whole computer. Keep in mind that select a reliable app, or some might leak your information.
Bottom Line
We have provided a guideline to help you clear the cache on your computer. Hopefully, it can solve your problems and enhance your experience.


