


Does your browser take forever to load a webpage, showing a “Resolving Host” message? You are likely facing a DNS bottleneck. This delay frustrates users and kills productivity.
Fortunately, you don’t need to be an IT expert to solve this. In this guide, we will explain exactly how to fix slow DNS lookup errors to restore your browsing speed immediately.
What Is DNS Lookup and Why Is It Slow?
DNS (Domain Name System) acts like the phonebook of the internet. When you type a website name, your computer asks a DNS server for the corresponding IP address.
If the DNS server is not responding, overloaded, distant, or misconfigured, you experience latency. Identifying the root cause is the first step in finding slow DNS lookups. Common causes include:
- Overloaded ISP Servers: Your Internet Service Provider’s default servers are often crowded.
- Corrupt Cache: Old data stored on your computer conflicts with new data.
- Malware: Malicious software intercepts your requests.
- Router problems: Temporary memory leaks in your hardware.
Read on to learn the most effective methods to fix these issues.
Method 1: How to Fix Slow DNS Lookup by Changing DNS Servers
The most effective way to speed up your connection is to ditch your ISP’s default servers. Third-party servers like Google or Cloudflare are often faster and more secure. Here’s exactly how:
For Windows Users:
- Open the Control Panel > Network and Internet.
- Select Network and Sharing Center > Change adapter settings.
- Right-click your active connection (Wi-Fi or Ethernet) and select Properties.
- Highlight Internet Protocol Version 4 (TCP/IPv4) and click Properties.
- Select “Use the following DNS server addresses” and enter: Google DNS: 8.8.8.8 (Preferred) / 8.8.4.4 (Alternate) or Cloudflare DNS: 1.1.1.1 (Preferred) / 1.0.0.1 (Alternate)
- Click OK to save changes.
For Mac Users:
- Go to System Preferences > Network.
- Select your network > Advanced.
- Navigate to the DNS tab.
- Click the + button and add the IP addresses mentioned above.
By switching to these optimized servers, you will reduce the “lookup” time significantly.
Related: How to Fix “This Network Is Blocking Encrypted DNS Traffic”?
Method 2: Flush Your DNS Cache
Your operating system stores DNS records locally to load websites faster. However, if these records become outdated or corrupt, they cause delays.
Flushing this cache is a quick, slow DNS lookups solution. Ensure that these commands are entered completely and accurately to avoid unnecessary complications.
Steps to Flush DNS on Windows:
- Press the Windows Key + R, type “cmd,” and press Enter.
- In the Command Prompt, type the following command: “ipconfig /flushdns.”
- Press Enter. You should see a message confirming the cache was successfully flushed.
Steps for Mac:
- Open Terminal.
- Type the following command (for macOS Monterey and later): “sudo dscacheutil -flushcache; sudo killall -HUP mDNSResponder.”
- Enter your admin password if prompted.
This forces your computer to request fresh, correct information from the server.
Method 3: How to Fix Slow DNS Lookup via Driver Updates
Outdated network drivers often cause communication errors between your PC and the DNS server. Keeping your hardware drivers current ensures smooth data transmission.
- Right-click the Start button and select Device Manager.
- Expand the Network adapters section.
- Right-click your network adapter (e.g., Intel or Realtek) and choose Update driver.
- Select “Search automatically for drivers.”
If Windows doesn’t find a new driver, visit the manufacturer’s website directly. Updating drivers eliminates compatibility issues that result in high latency.
Method 4: Use a VPN to Bypass ISP Throttling and DNS Issues
Sometimes, the problem isn’t your computer settings – it’s your Internet Service Provider (ISP). ISPs often throttle bandwidth or use inefficient routing, which results in significant lag.
If you are wondering how to fix slow DNS lookup without complex manual configuration, using a dedicated VPN is often the smartest choice.
A VPN encrypts your traffic and routes your DNS requests through its own private, high-speed DNS servers. This bypasses your ISP’s congested infrastructure entirely.
For users needing a balance of speed and stability, we recommend LightningX VPN.
Unlike standard proxies, LightningX VPN uses the AES-256 encryption algorithm, the most secure one, designed to minimize latency.
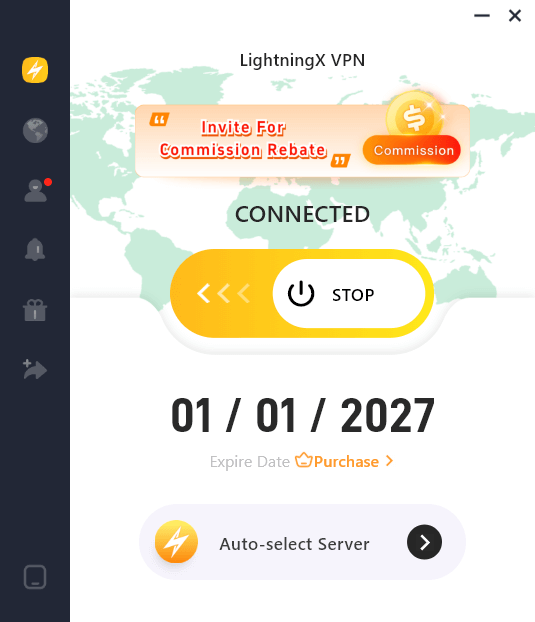
When you connect, it automatically handles DNS resolution through secure, optimized tunnels. This not only serves as a robust slow DNS lookups solution but also prevents your ISP from tracking your browsing history.
Why this helps in detail:
- Reduced Hops: It routes your data through a more direct path.
- Privacy: It prevents “DNS Leaks,” ensuring your queries stay private.
- Simplicity: You solve the speed issue with a single click, rather than editing registry files.
Method 5: How to Fix Slow DNS Lookup by Editing the Hosts File
The “Hosts” file is a text file on your computer that maps hostnames to IP addresses. If this file contains incorrect entries or malicious lines added by malware, your browser will struggle to connect.
How to check the Hosts file:
- Navigate to C:\Windows\System32\drivers\etc.
- Open the hosts file using Notepad (run as Administrator).
- Look for any suspicious website addresses listed at the bottom.
- If the file looks cluttered with entries you didn’t add, reset it to the default.
Cleaning this file ensures your computer doesn’t look for websites in the wrong locations.
Method 6: Disable Unused Network Adapters
Modern computers often have multiple network connections enabled simultaneously (e.g., Wi-Fi, Ethernet, Bluetooth Network, Virtual connections). These can cause conflicts. Windows might try to use a slower, disconnected adapter to resolve a DNS query.
To streamline your connection:
- Open Control Panel > Network and Sharing Center.
- Click Change adapter settings.
- Right-click any connection you are not currently using.
- Select Disable.
By leaving only your primary internet connection active, you force the system to use the correct path for DNS queries.
Related: How to Fix DNS Error (Quickly and Easily)
Method 7: Reboot Your Router to Clear Internal Cache
It sounds cliché, but restarting your router is a legitimate engineering fix. Routers have their own CPU, memory, and DNS cache. Over time, the memory fills up, and the device slows down.
The Power Cycle Method:
- Unplug your router from the power source.
- Wait for at least 30 seconds (this drains residual power).
- Plug it back in and wait for the lights to stabilize.
This clears the router’s internal cache and establishes a fresh connection with your ISP, often instantly solving the lag.
Conclusion
A slow internet connection disrupts work and leisure, but the culprit is often just a configuration error. Apply these seven proven methods to fix slow DNS lookup. Whether you choose to flush your cache, change servers, or use lag-reduce tools, you can perform effective DNS lookups.


