


Do you want to post an engaging Instagram post to interact with friends or gain followers? Instagram offers a variety of posting features, including Story, Feed Post, and Reel. In addition to the mobile app, Instagram’s website also supports posting, though with some limitations.
Next, we’ll guide you through how to post on Instagram using both the mobile app and the web.
Limitations of Posting on Instagram
Before posting on Instagram, it’s important to know the limits for uploading photos and videos on mobile and web.
Posting on Instagram Mobile
Feed Posts:
- You can upload up to 20 photos or videos at a time.
- Videos should ideally be no longer than 10 minutes. For longer videos, upload via IGTV (Instagram’s long-video format).
- Recommended file size: up to 650 MB for short videos, up to 3.6 GB for long videos.
Stories:
- You can upload up to 10 photos or videos at a time.
- Each video must be no longer than 15 seconds. Note: If a video is longer than 15 seconds, Instagram will automatically split it into multiple story segments.
Reels:
- Videos can be up to 90 seconds long (some accounts may have a limit of 10 minutes).
- Maximum file size: 4 GB.
- Minimum resolution: 750 pixels; recommended resolution: 1080×1920 pixels.
- Supported formats: MP4 and MOV.
Posting on Instagram Web
- You can upload up to 20 photos or videos at a time.
- Videos can be up to 10 minutes long.
- Supported formats: MP4 and MOV.
- Posting Stories is generally not available on Instagram Web.
- Reels posting may be supported in some regions, but is primarily designed for the mobile app.
Tip:
If your Instagram account is for business, protecting its security is very important. As for this, you can use a VPN to prevent the account from being hacked. You can choose LightningX VPN. This is the best VPN for Instagram, Discord, Netflix, YouTube, and TikTok. There are 2,000+ server options and 70+ countries. It doesn’t throttle bandwidth and traffic usage.
It supports PCs, Macs, Android phones, iPhones, iPads, Linux devices, and TVs. Its interface is very user-friendly. Just tap the Connect button, and you can unlock everything in your hand.
How to Post to Feed, Story, Reel, and Go Live on Instagram Mobile
Posting content on Instagram—whether a feed post, story, reel, or live—is done through the plus (+) button. This guide covers step-by-step instructions for iPhone, Android, and iPad, so you can share content with your audience easily.
Access Posting Options
1. Open Instagram on your mobile device.
2. Tap the + icon at the bottom center (iPhone/Android) or top right (iPad).
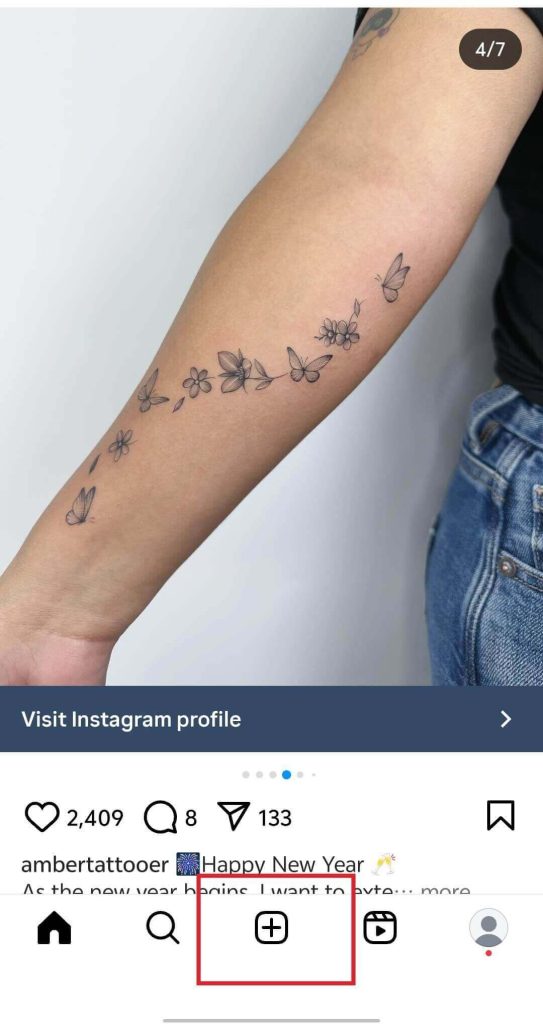
3. You’ll see four options: Post, Story, Reel, Live. Tap the feature you want to create.
Note: The interface may slightly vary between iOS and Android, but the core steps are the same.
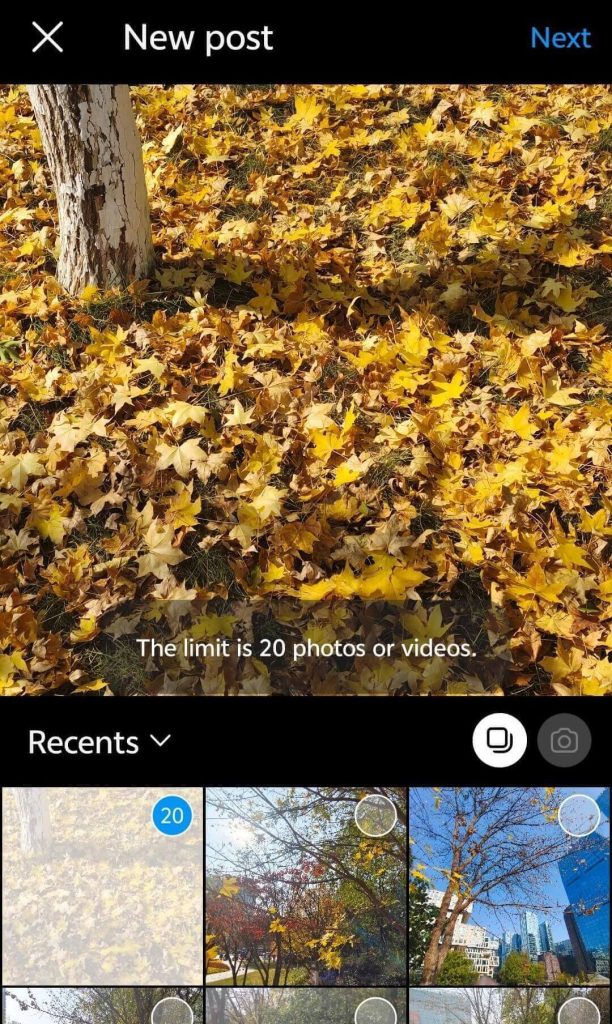
Step 1: Select photos or videos.
- Tap the stacked squares icon or Select Multiple to pick up to 10–20 items.
- To take a new photo or video, tap the camera icon.
- Tap Next (top right) to proceed.
Step 2: Edit your media.
- Apply filters, crop, adjust brightness, or add effects.
- Add text, stickers, or music using the icons at the bottom.
Instagram may restrict copyrighted music—avoid uploading downloaded music that may violate copyright.
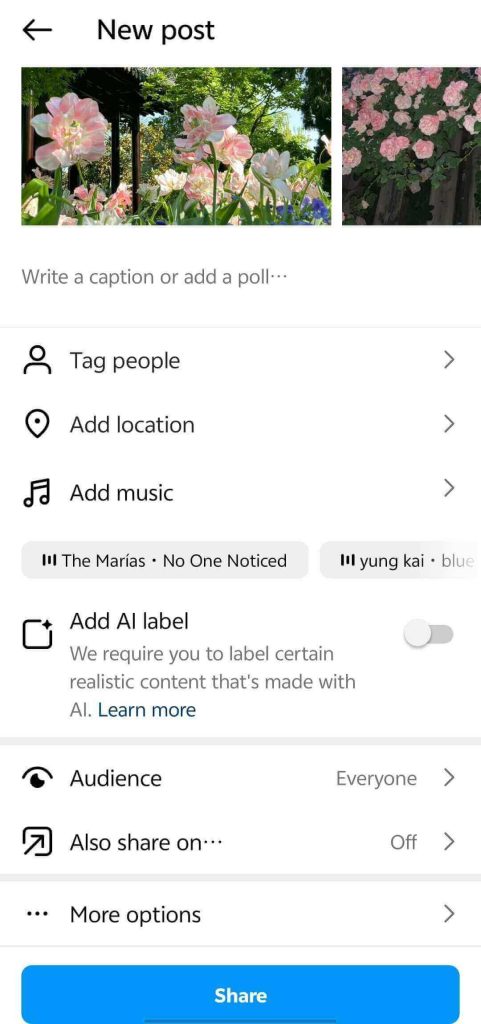
Step 3: Add caption and post details.
- Write your caption to share your thoughts.
- Optional features:
- Tag People – Invite others to collaborate.
- Add Location – Show your current location.
- Audience – Choose who can see your post.
- Also Share On – Share to other linked platforms.
- More Options – Disable comments or hide likes/shares.
Step 4: Publish the post.
- Tap Share to post. If connected accounts are available, you can choose to share across platforms.
Step 5: Delete a post.
- Go to your profile, tap the post’s three dots (top right), select Delete, and confirm.
Tip: Many apps allow you to download music for free. Choose one from the internet, then download songs to use in your Instagram posts.
Step 1: Enter Story Mode.
- Tap Story, and the camera will open automatically.
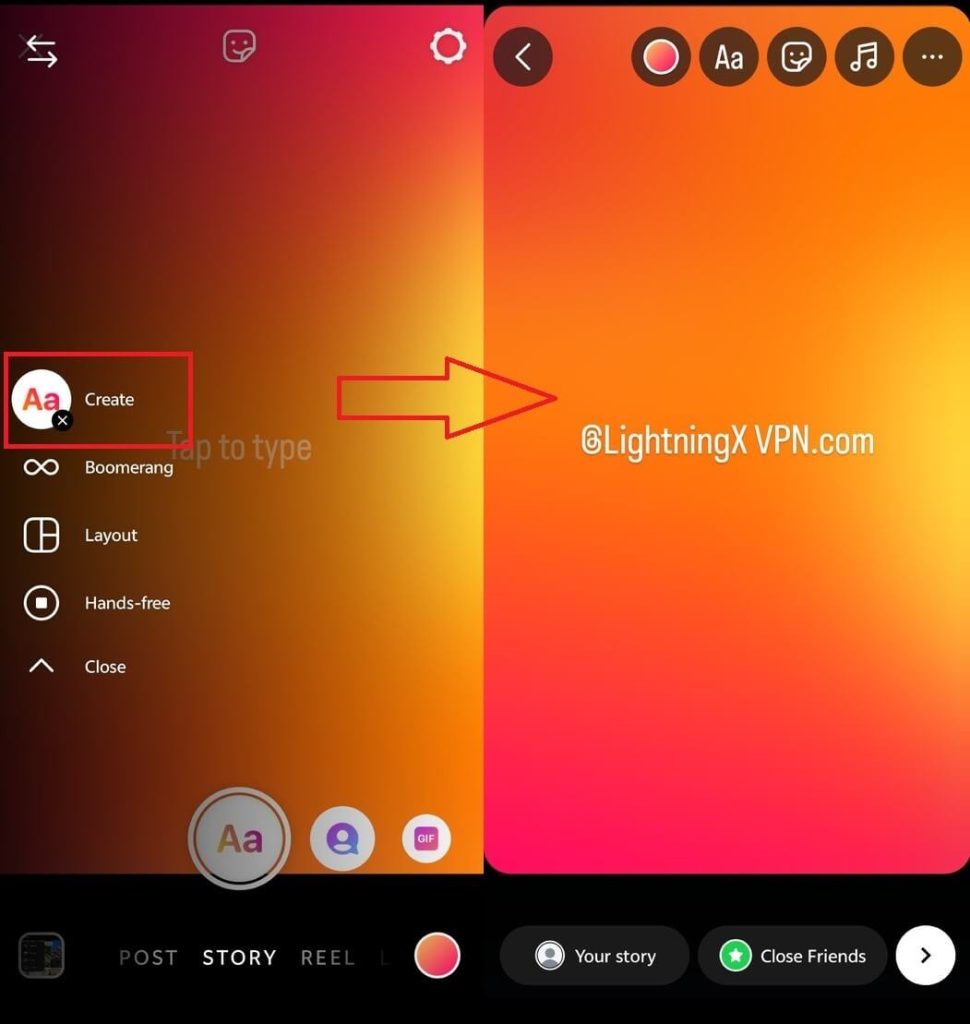
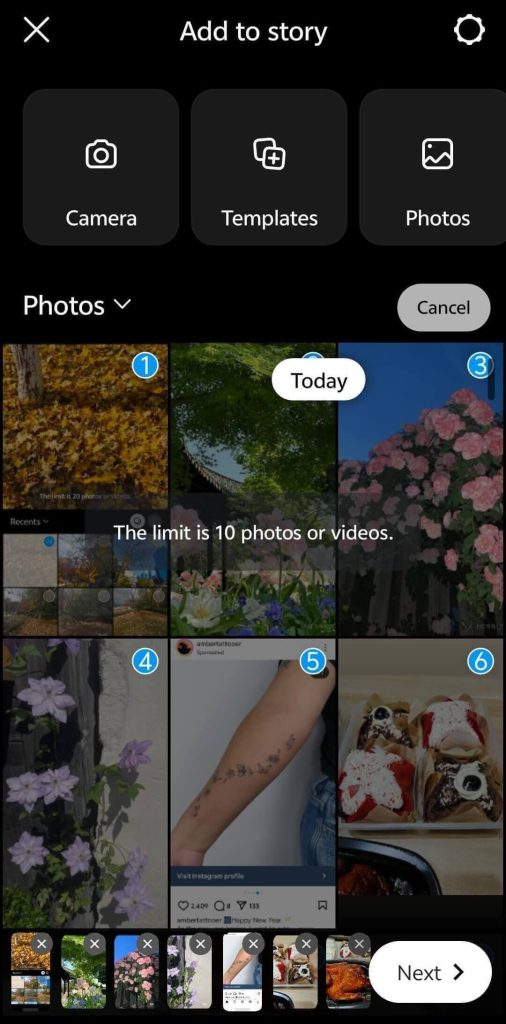
Step 2: Capture or upload content.
- Capture a photo/video or tap the gallery icon to select from your phone.
- You can select multiple items (up to 10) or use a template if available.
Step 3: Edit your Story.
- Add text, GIFs, stickers, links (if available), or music.
- Use Layout to combine multiple images.
- Tap the right arrow to proceed.
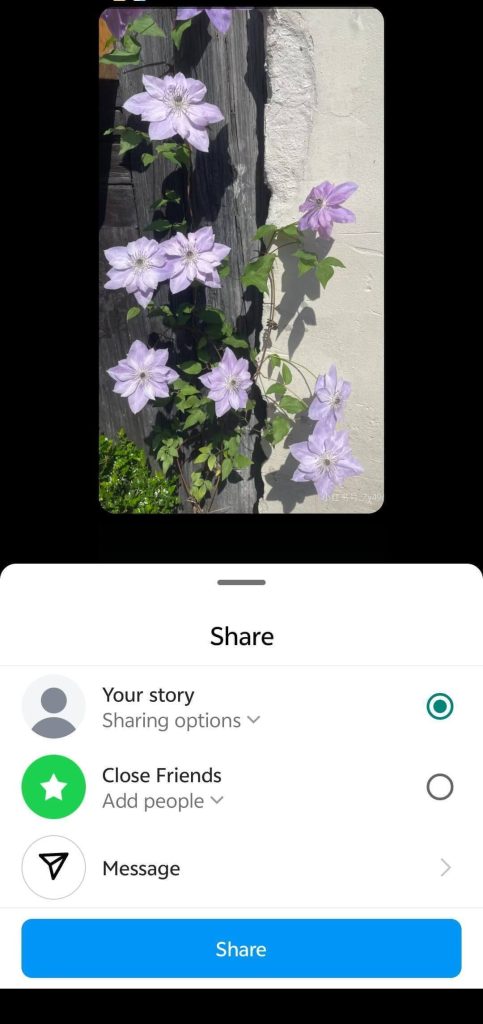
Step 4: Share Story.
- Select your audience and platform.
- Tap Share to post your story.
Step 5: Delete a Story.
- Tap your profile picture, then the three dots at the bottom right.
- Select Delete and confirm.
Links in stories are only available for eligible accounts (business/creator or certain follower counts).
Step 1: Create a reel.
- Tap Reel after pressing the + button.
- Select videos or photos from your gallery (up to 10–15 items).
Step 2: Edit the reel.
- Tap Edit to add:
- Text, stickers, captions, filters, or music.
- Voiceovers if needed.
Step 3: Add reel details.
- Add caption, tags, location, and audience settings.
Step 4: Share the reel.
- Tap Next, then Share to post your Reel.
Step 5: Delete a reel.
- Open your profile, locate the Reel, tap the three dots, select Delete, and confirm.
- Deleted Reels cannot be recovered.
How to Go Live on Instagram
Step 1: Enter live mode.
- Tap Live after pressing the + button.
- Your camera will open for live streaming.
Step 2: Set up live.
- Add a title, choose audience (public/friends), or add filters.
- You can invite collaborators to join your live stream.
Step 3: Start and end live.
- Tap Go Live to start.
- Tap End when finished, then choose to Save or Discard the video.
How to Post on Instagram from PC
You cannot post Stories from Instagram web in most regions, but you can still share photos and videos to your feed.
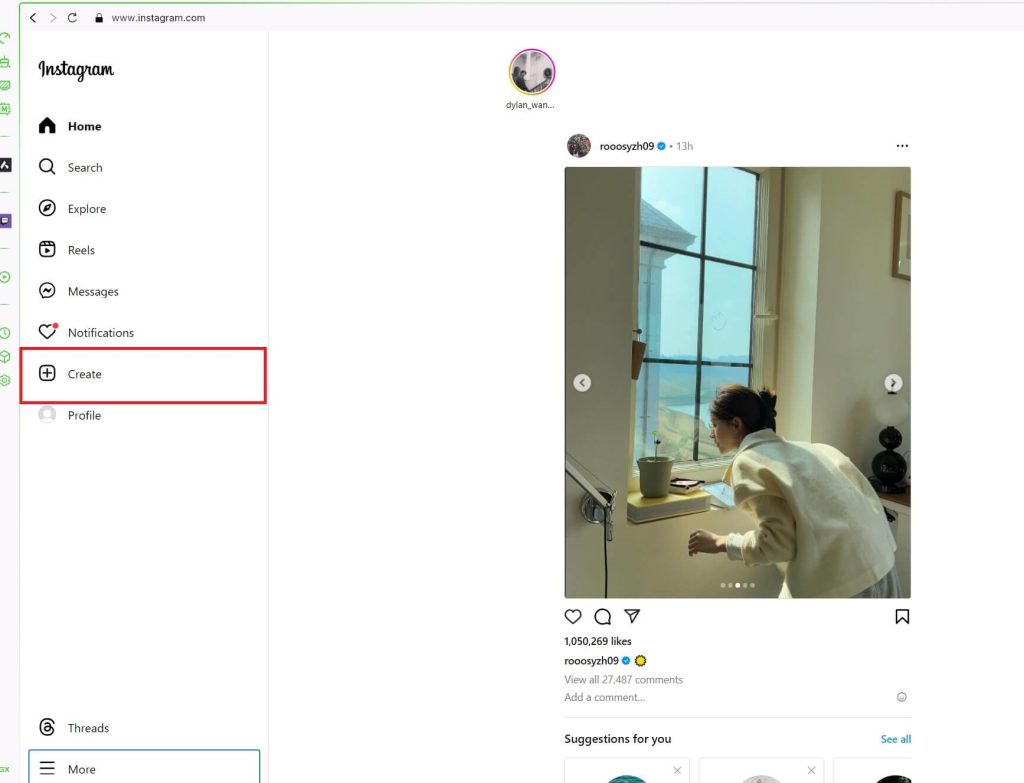
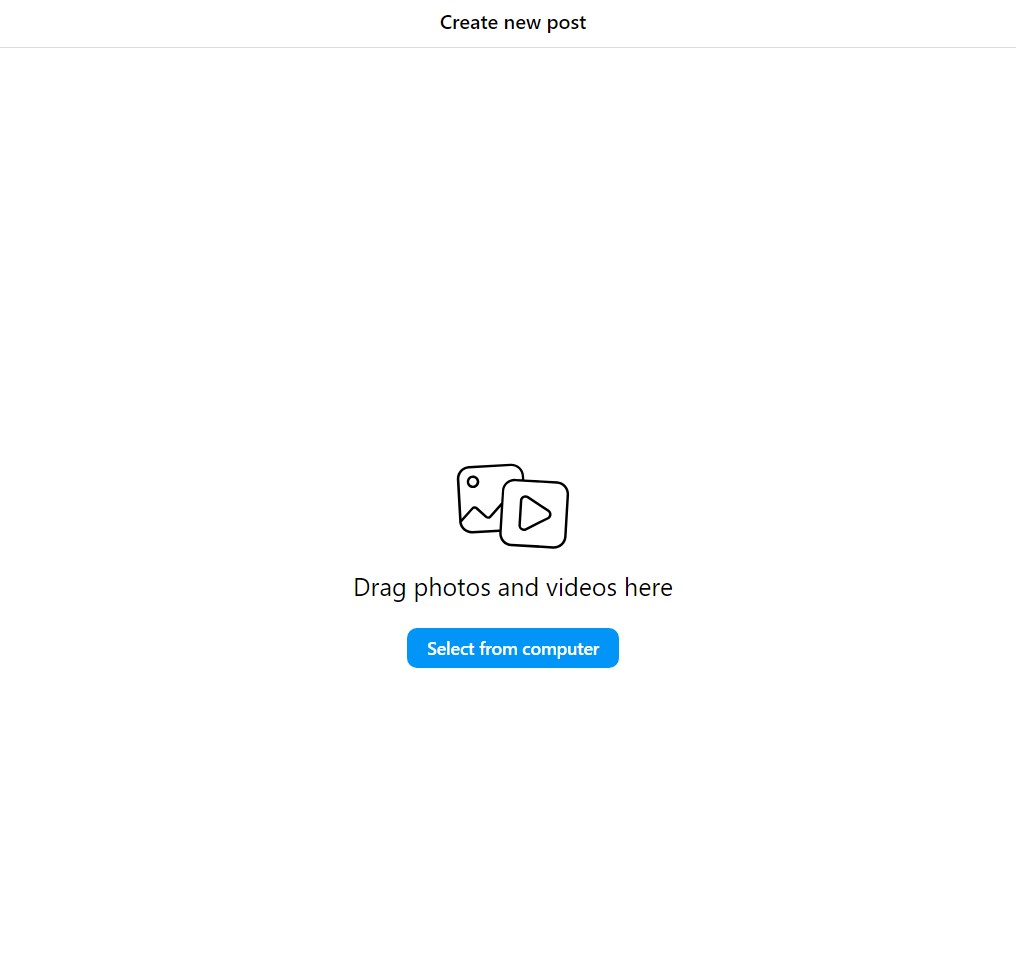
Step 1: Open Instagram.com in a web browser and log in to your account.
Step 2: Click the Create button (usually on the left menu or top right) to start a new post.
Step 3: Click Select from computer to open your file explorer. Choose the photo or video you want to upload.
Step 4: After selecting your media, click Next (top right). You can add filters or adjust image/video settings, although editing options are more limited than on mobile.
Step 5: Add a caption, location, and collaborators.
Choose who can see your post. In Advanced Settings, you can:
- Hide likes and view counts
- Turn off comments
- Share to Threads (if available)
Step 6: Click Share (top right) to publish your post on Instagram.
Step 7: To delete a post, open your profile, click the post, tap the three dots, and select Delete. Confirm to remove the post. Note: Deleted posts cannot be recovered.
How to Schedule a Post on Instagram
Scheduling posts on Instagram requires a Business or Creator account. If you have a personal account, you can switch it to a professional account or use third-party tools like Later, Buffer, or Hootsuite.
1. Switch to a Business or Creator Account
- Go to your profile and tap Settings.
- Tap Account > Switch to Professional Account.
- Choose Business or Creator and follow the on-screen instructions to complete the process.
2. Schedule a Post
Instagram does not currently allow scheduling posts directly from the mobile app. To schedule a post officially, use Meta Business Suite or Creator Studio on a desktop:
- Open Meta Business Suite or Creator Studio and log in with your Instagram account.
- Click Create Post > Instagram Feed.
- Add photos or videos, write your caption, and adjust post settings.
- Instead of Publish, choose Schedule.
- Pick the date and time for your post, then confirm.
3. Alternative: Third-Party Tools
If you prefer using a mobile app, third-party tools like Later, Buffer, or Hootsuite allow you to schedule posts without switching to a professional account.
- Connect your Instagram account to the tool.
- Upload photos/videos, write captions, and set the posting time.
How to Repost a Post on Instagram
Instagram doesn’t support a built-in repost feature. You can choose to screenshot it, add it to your story, or share it with your friends. However, if you want to show the post to the public, you should ask for permission from the poster. Some posters don’t allow others to use their posts for business purposes.
You can also check our guide to learn more: How to Repost on Instagram (Posts, Reels, and Stories)
In the End
After reading through this post, you might know how to post on Instagram. You can share your daily life, pets, food, or mood with your friends or lovers. At the same time, you should also follow Instagram’s community posting guidelines and avoid posting inappropriate content.


