


You might want to erase all your information before selling it, solve technical problems, or simply start fresh. Whatever your reason, knowing how to reset a MacBook Air is important, but you need to ensure that you follow the right steps to avoid complications.
In this article, we will guide you through the process of resetting your MacBook Air, erasing all your data, and making sure your personal information is safe.
When Should You Want to Reset MacBook Air?
There are various reasons why you might need to reset your MacBook Air:
- Selling or giving away your MacBook Air: Before handing your device to someone else, it’s important to erase all your personal information to protect your privacy.
- Fixing software issues: If your MacBook is running slowly, freezing, or crashing, a reset can help solve these problems by restoring your device to its factory settings.
- Starting fresh: Sometimes, after using a device for a long time, resetting it to factory settings can make it feel like new again.
Regardless of your reason, it’s crucial to back up your important files before proceeding with the reset. Once you erase everything, your data will be lost, and you won’t be able to recover it.
Step-by-Step Guide: How to Reset MacBook Air
Let’s go through the steps of resetting your MacBook Air and erasing all your information in the process.
Step 1: Backup Your Data
Before you reset your MacBook Air, it’s vital to back up your data. You can use Time Machine, Apple’s built-in backup software, or an external hard drive to save your files. Here’s how you can use Time Machine:
- Connect an external hard drive to your MacBook Air.
- Open System Preferences from the Apple menu.
- Click Time Machine and select Backup Disk.
- Choose your external hard drive and let Time Machine create a backup of your data.
Backing up ensures that you don’t lose important documents, photos, or apps that you might need later.
Step 2: Sign Out of iCloud and Other Services
Before wiping your MacBook Air, make sure you sign out of iCloud and other services such as iMessage and FaceTime. Here’s how to do it:
- Sign out of iCloud: Open System Preferences and click on Apple ID. Then, select Overview and click Sign Out. Make sure to keep a copy of your iCloud data if you wish.
- Sign out of iMessage: Open the Messages app, click on Messages in the menu bar, and select Preferences. Go to the iMessage tab and sign out.
- Sign out of FaceTime: Open FaceTime, click on FaceTime in the menu bar, and select Preferences. Then, sign out.
- Disable Find My Mac: Go to System Settings (or System Preferences). Then select your Apple ID / iCloud. Find “Find My Mac” and click Turn Off. Enter your Apple ID password to confirm. Failure to complete this step will lock the devices for the next owner.
Signing out of these services helps protect your data and ensures that no one else will have access to your accounts after the reset.
Step 3: Reset Your MacBook Air
The process for entering Recovery Mode and erasing the drive varies significantly depending on the type of processor in your MacBook Air. You must identify your chip type first.
The Easiest Method (macOS Monterey or Newer)
Suppose your MacBook Air runs macOS Monterey (12) or later (including Ventura and Sonoma), and you are resetting for sale or a fresh start. In that case, this is the quickest and safest method for both M1/M2 and Intel Macs with the T2 Security Chip:
- Access Erase Assistant: Click the Apple logo () in the top-left corner of the screen.
- Choose System Settings (or System Preferences on Monterey).
- Go to General (Ventura/Sonoma) or stay in the main System Preferences menu (Monterey).
- Select Transfer or Reset (or find Erase All Contents and Settings under the main menu in Monterey).
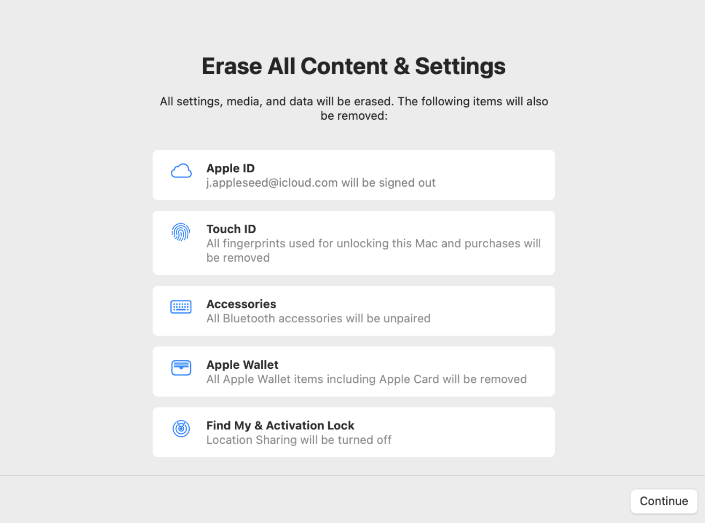
- Click Erase All Contents and Settings.
- Follow the on-screen instructions, enter your password, and click Erase Mac.
- The Mac will automatically handle the unpairing of your Apple ID/Touch ID, erase all data, and reinstall a fresh copy of macOS.
Traditional Recovery Mode Method
If the above option is unavailable (e.g., you are running an older macOS version or fixing a boot loop), you must manually enter Recovery Mode:
For Apple Silicon Chips (M1, M2, M3):
- Shut down your MacBook Air completely.
- Press and hold the Power button (which is also the Touch ID button). Keep holding it until you see the startup options screen appear.
- Click Options, then click Continue.
For Intel Chips (Older Models):
- Shut down your MacBook Air completely.
- Press the Power button, and then immediately press and hold the Command (⌘) + R keys together.
- Continue holding the keys until you see the Apple logo or a spinning globe, indicating you have successfully entered Recovery Mode.
Once you are in macOS Recovery:
- Select Disk Utility: On the recovery screen, choose Disk Utility and click Continue.
- Erase the Disk: In Disk Utility, select your main internal hard drive (usually named Macintosh HD).
- Click the Erase button, set the Format to APFS, and click Erase Volume Group (or Erase). This securely wipes all your data.
- Reinstall macOS: Close Disk Utility, return to the main Recovery menu, select Reinstall macOS, and follow the on-screen prompts to install a fresh operating system.
Once the reinstallation process is complete, your MacBook Air will be restored to factory settings, with all your personal information erased.
Step 4: Set Up Your MacBook Air (Optional)
This final step differs depending on whether you are keeping the Mac or selling it.
- If you are keeping the MacBook Air: Go through the initial setup process as if the device were brand new. You’ll be asked to sign in with your Apple ID, choose language and region settings, and set up other preferences.
- If you are selling or giving away the MacBook Air: DO NOT PROCEED PAST THE SETUP ASSISTANT. The Mac will boot up to the “Hello” screen, asking for a language selection. This screen confirms that all your data and Apple ID associations have been successfully removed. At this point, you should press the Power button to shut the Mac down and package it for the new owner.
Related: How to Wipe a Computer Securely [Take-it-easy Solution]
Extra Tip: How to Protect Your Data After Resetting
Once you’ve erased your MacBook Air, you might be concerned about keeping your online activities secure.
For instance, LightningX VPN is a highly recommended VPN service that offers top-level security, privacy, and speed. With it, you can browse any network safely and access content from different regions.
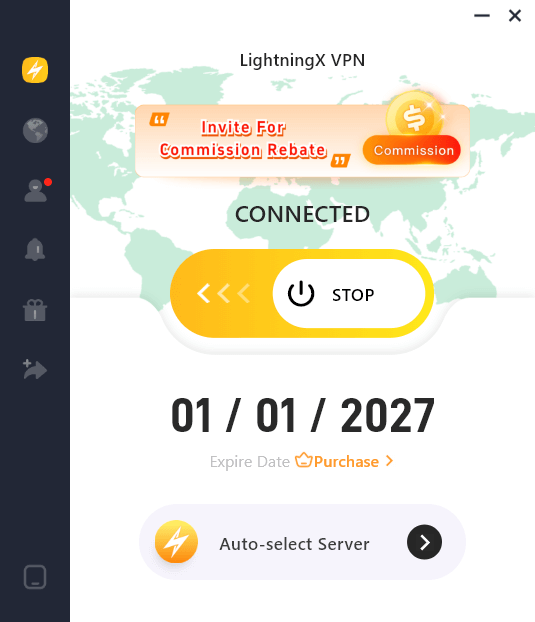
In addition to keeping you safe, LightningX VPN offers a variety of features such as:
- Fast connections: Perfect for streaming, gaming, and browsing without lag.
- Servers in multiple countries: It has 2000+ servers (including 3 free nodes) in more than 70 countries to access content from different regions, whether it’s blocked in your area or country.
- User-friendly app: Easy to use on your MacBook Air and other devices.
Conclusion
Resetting your MacBook Air and erasing all your data might seem like a daunting task, but with the right steps, it’s simple. Always make sure to back up your important files and sign out of your accounts before proceeding with a reset. Whether you’re doing it to solve issues or prepare your device for a new owner, following this guide will ensure that the process is smooth and your data is safely erased.


