“Please disable the VPN or the proxy”, this error message is commonly seen in various applications and websites after they have detected users are browsing via virtual IPs. This restriction somehow also prevents people from scams and hackers logging into their accounts thousands of miles away leading to information leaks and money loss.
In this post, we will introduce you under which certain scenarios, disabling a VPN or proxy is needed. Learn how to disable a VPN or proxy on iPhone/Android/PC/Mac/TV, etc.
How to Disable a VPN or Proxy on Your Devices 2024
A VPN (Virtual private network) or proxy is the most commonly installed tool application on everyone’s devices nowadays. It is, indeed, a powerful tool to protect us in this digital world from becoming invisible again. Not only hides your online browsing traces, and IPs and bypasses Geo-restrictions, but also prevents you from hackers and numerous annoying ads.
Now it’s time for me to recommend that everyone who is reading this article get the best VPN – LightningX VPN. The one and only VPN that provides users unlimited bandwidth and no speed limitations, It supports iOS; Android; macOS; Windows; Android TV; tvOS, and more, no matter whether you are a streaming lover; a pro gamer; who loves to download huge files frequently; or who takes online privacy seriously, LightningX VPN is here waiting for you. You know what’s the best part? Everyone who downloads it from the Google Store or Apple Store gets a 7-day free trial after 1st subscription and a 30-day money-back guarantee!

Disabling a VPN will get you and all the files saved on your devices exposed to the network and all those applications or websites that requested authorities to read your information. Privacy no longer exists, but it is understandable that sometimes people need to turn it off for certain purposes and we will talk about those scenarios later in this article. We are here to help you turn off all kinds of VPN or proxy services across platforms and devices.
Scenarios That Need to Disable VPN or Proxy
If you meet the “Please disable the VPN or the proxy” error when trying to visit websites or apps online, it might be caused by the following reasons.
- Banking and Financial Services: To prevent fraud and ensure transactions are legitimate, banks often block VPNs.
- Streaming Services: They enforce geo-restrictions due to licensing agreements and try to prevent users from accessing content that is not available in their region.
- Online Gaming Platforms: VPNs are often blocked to prevent cheating, fraud, and circumvention of regional restrictions.
- E-commerce Websites: To combat fraud, unauthorized access, and manipulation of pricing, these sites may restrict VPN access.
- Government Services: Security and compliance with local regulations are the main reasons behind VPN restrictions on government websites.
- Ticketing Services: To prevent scalping and ensure fair ticket distribution, these platforms might block VPN users.
- Social Media Platforms: While less common, some platforms may block VPNs to prevent spam, fake accounts, and malicious activities.
- Gambling Sites: Compliance with regional gambling laws and prevention of fraud are key reasons these sites may restrict VPN access.
- Subscription-Based Services: These platforms might restrict VPNs to enforce regional pricing and prevent abuse of their services.
- Corporate Networks: To maintain security and prevent bypassing of company policies, VPNs may be restricted on corporate networks.
- Forums and Online Communities: VPNs may be blocked to prevent trolling, spam, and the creation of multiple accounts.
- Educational Institutions: VPNs might be restricted to prevent cheating on online exams and unauthorized access to resources.
How They Detect VPN Usage:
- IP Address Detection: Websites may detect and block known VPN IP addresses.
- DNS Leaks: If a website detects that your DNS requests are going through a VPN, it may block access.
- Traffic Analysis: Some sites analyze traffic patterns to detect and block VPN usage.
An exceptional VPN app should offer a wide range of IP addresses, not just any IPs, but dedicated and native ones that enhance user privacy and security. Additionally, the protocols used must effectively prevent DNS leaks, ensuring robust protection for users. Some of the most renowned VPN applications that meet these standards include ExpressVPN, NordVPN, SurfShark, and LightningX VPN.
Among these top-tier VPNs, users often seek the best value, wanting the same advanced features at a more affordable price. When it comes to being the most cost-effective, LightningX VPN stands out as the clear champion—unlimited bandwidth & speed with a much lower price. LightningX VPN provides an exclusive offer: buy one year and get an additional year free for just $59.99. This makes it more affordable than its competitors while delivering services that match the quality of all top-tier VPNs. Still concerned about the price? Consider this: they also offer a 7-day free trial and a 30-day money-back guarantee. Now or never—take action and secure your online privacy today!
The Easiest way to turn VPN off:
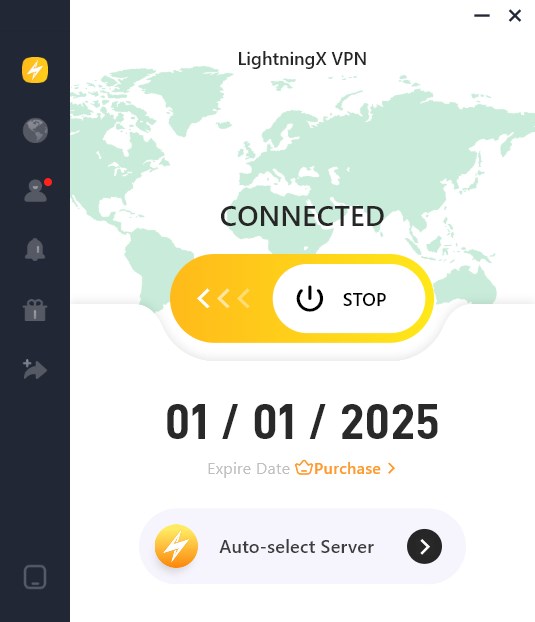
No matter whether you are using a VPN application on your Android, iOS, Windows, macOS, or Linux system. These programs or applications usually come with a home page that allows you to turn it off by clicking, toggling, tapping, or sliding the same button you used to turn it on. But sometimes you will find out the VPN is still working even if you turn it off in the application, this is the time you need to turn it off manually.
Manually Disable Your VPN or Proxy on Any Devices
Under a few complicated circumstances, troubleshooting a network, VPN app or proxy service bug may cause you to fail to turn it off. This is exactly the time when manually shut proxy services down on all kinds of systems get involved.
Disable VPN/Proxy on iOS (iPhone and iPad)
It’s super easy to disable a VPN on iOS devices, it only takes a few steps to do so. Here is the approach to turn off a VPN on iPhone and iPad:
- Go to “Settings”.
- For those who have upgraded to iOS 16.0 and above, select “VPN” directly. For iOS version below 16.0 click “General”, then find and select “VPN & device management”.
- Slide or tab the VPN status to not connected.
Disable VPN/Proxy on Android
It only takes a few seconds to disconnect the VPN, it may vary among different Android phone or tablet providers. But don’t worry, the basic principle remains the same:
- Go to “Settings” and tap “Network and Internet”.
- Find and click “VPN”, then select the application whose status shows “connected”.
- Select ” Disconnect”.
Disable VPN/Proxy on Windows 10/11 and Other Versions
It takes a little bit more tedious steps than other devices, let us help you out within seconds, there are two ways on Windows that would allow you to use VPN services: “Tunnel Mode” and “System Proxy”:
– How to disable a VPN through Tunnel mode on Windows:
- Click or press the “Windows” icon on the keyboard, find and select “Settings”.
- Left-click on “Network & Internet” or search it on the search bar.
- Go to “Status”, and then click “Change adapter options”.
- Now all your computer’s network services will be exposed to you, find the program or software that provided the VPN services, you may tell from the network name.
- Last, right-click the one that shows “Tunnel” or “Windows Adapter” and select “Disable”.
– How to disable a Proxy through System Proxy on Windows:
- Go to “Network & Internet”, the same steps written above.
- Select “Proxy” this time, find and turn off the switch under “Manual proxy setup”.
Tip: Do not change the “Address” and “port” during the connection, It may lead to a network error.
Disable VPN/Proxy on macOS
It is similar to the Windows approach, you can turn off the VPN both in the application/ program or in settings. Don’t worry if you have no idea which mode your VPN service program is using, we will provide you with all approaches about how to disable Proxy on macOS
– “Tunnel mode”
- Press “command+space”, and search “Activity Monitor”.
- Find and select the VPN service, then click the “Stop” icon at the top banner of “Activity Monitor”.
– “System proxy”
- Go to “System Settings” ( click “Network” for old macOS version).
- Find and click on “VPN” at the left side of the menu bar.
- Slide the switch on the right-side panel to “Disconnected”.
Disable VPN/Proxy on TV
Virtual private network programs are also popular on TV devices now due to growing streaming demands, with the development of smart TV. But most of you may not be familiar with the settings especially when it comes to network, I will handle it for you guys:
Android TV:
You can only disable VPN in its application, the same way how you turned it on.
tvOS:
- Go to “Settings” > “General”.
- Scroll down to the bottom of the menu, find and select the VPN service provider for example ” LightningX VPN”.
- Click on the status “Not Connected”.
Disable VPN/Proxy on Linux
To turn off a VPN on Linux, you can use different methods depending on the VPN client or service you are using. Here are general steps for some common VPN clients:
– Using Network Manager (GUI Method)
Step 1. Open Network Settings.
- Click on the network icon in your system tray.
- Select “Settings” or “Network Settings.”
Step 2. Find the VPN Connection.
- In the network settings, look for the VPN section.
- Find the active VPN connection.
Step 3. Turn Off the VPN.
Click on the active VPN connection to disconnect it.
– Using Command Line
1. OpenVPN
If you’re using OpenVPN, you can disconnect by running the following command:
Code: sudo systemctl stop openvpn-client@client
Replace “client” with the name of your OpenVPN configuration file without the .conf extension.
Alternatively, if you started OpenVPN with a .ovpn file, you can stop it using:
Code: sudo killall openvpn
2. WireGuard
For WireGuard, use the following command to bring down the VPN:
Code: sudo wg-quick down wg0
Replace wg0 with the name of your WireGuard interface.
3. PPTP or L2TP/IPsec
If you use PPTP or L2TP/IPsec with a PPTP client or xl2tpd, you can stop the connection with:
Code: sudo poff
Or, for xl2tpd:
Code: sudo systemctl stop xl2tpd
– Using a VPN Client Application
If you’re using a specific VPN client application (e.g., NordVPN, ProtonVPN), you can disconnect using their command-line tools:
NordVPN
Code: nordvpn disconnect
Tip: Replace the command according to the VPN service you are using.
Disable VPN/Proxy on Router
Disabling a VPN on a router can vary depending on the router’s brand and firmware. Here are general steps that apply to most routers:
Step 1. Access Router’s Web Interface.
Open a web browser and type the router’s IP address into the address bar. Common default IP addresses include 192.168.1.1 or 192.168.0.1.
Step 2. Log In to the Router.
Enter the router’s username and password. If you haven’t changed these, they are usually found on a sticker on the router or in the router’s manual (common defaults are admin/admin or admin/password).
Step 3. Navigate to VPN Settings.
Once logged in, look for the VPN settings. This is often found under sections like Advanced, VPN, Security, or Services.
Step 4. Disable the VPN.
Find the setting that enables the VPN. This might be a checkbox, toggle switch, or drop-down menu. Then turn off or disable the VPN connection.
Step 5. Save Settings and Reboot.
Save the changes you made and reboot the router if necessary (some routers may do this automatically).
How to Disable a VPN Permanently
I have to say this must be the easiest way to disable it permanently on any device. Simply delete the program and applications that support your VPN services!
It may also get tedious when it comes to manually shutting it down permanently without deleting the application or program on different devices, here are the exact steps:
– On Windows
- Go to Settings > Network & Internet > VPN.
- Find the VPN connection you want to disable.
- Click on the VPN connection and select Remove or Delete.
- Confirm the removal to permanently disable the VPN.
– On macOS
- Go to System Preferences > Network.
- In the list on the left, select the VPN connection you want to disable.
- Click the minus (-) button at the bottom of the list to remove the VPN configuration.
- Confirm the removal to permanently disable the VPN.
– On iOS (iPhone/iPad)
- Go to Settings > General > VPN & Device Management.
- Tap on the VPN profile you wish to disable.
- Select Delete VPN.
- Confirm the deletion to permanently disable the VPN.
– On Android
- Go to Settings > Network & Internet > VPN.
- Tap on the VPN connection you want to disable.
- Select Forget or Delete.
- Confirm the removal to permanently disable the VPN.
– On Linux
- Navigate to the VPN configuration files, typically located in /etc/NetworkManager/system-connections/.
- Identify the specific VPN configuration file you want to disable.
- Use the following command to delete the configuration file:
- code: rm /etc/NetworkManager/system-connections/<vpn-file-name>
- Replace <vpn-file-name> with the name of your VPN configuration file.
- After deleting the file, restart your network service or your computer to ensure the VPN is permanently disabled.
Recap
If you meet the “Please disable the VPN or the proxy” error when browsing online, the steps of disabling a VPN or proxy on iPhone/Android/PC/Mac/TV are so easy to get done within 30 seconds.
However, please keep in mind that turn your VPN back on as soon as possible once you have accomplished your tasks! No one wants to browse the internet “naked,” exposing themselves to individuals or organizations with ulterior motives. Stay safe and enjoy your secure browsing, everyone!


