


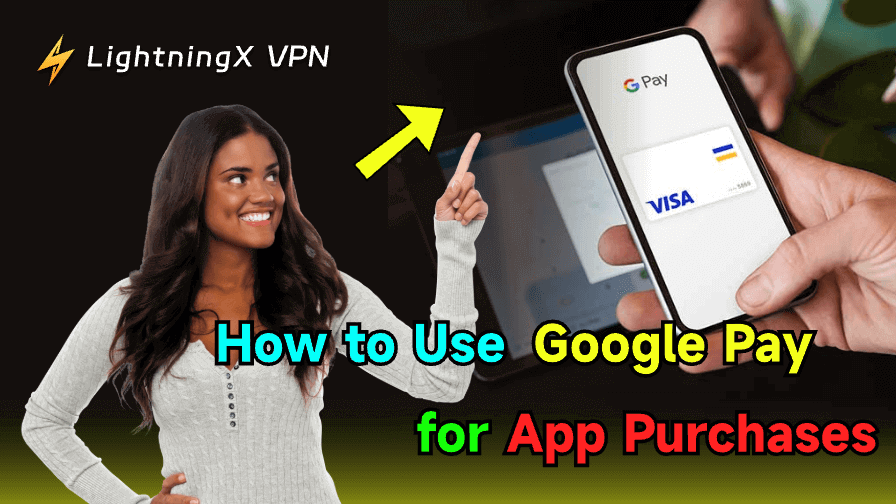
The last thing anyone wants when shopping is to hit a wall on the payment screen. You find something cool, tap “install” or “buy,” and suddenly, you’re fumbling through your wallet – or worse, typing out a 16-digit card number on your phone. That’s where Google Pay steps in and makes life smoother. If you’ve ever wondered how to use Google Pay just to pay for apps, this might be a good place to start.
What Is Google Pay? Do You Even Have Google Pay?
Google Pay is Google’s vision of what a modern wallet should be. It was originally launched as Android Pay and later merged with Google Wallet. Now, it has evolved into a flexible platform that lets you make purchases, store cards, and manage transactions, all in one place.
It doesn’t simply transfer your card number to the merchant. Instead, it uses advanced encryption and tokenization to create a virtual account number – so your actual card details stay hidden.
That means even when you’re shopping on unfamiliar websites or tapping your phone at a terminal, your sensitive information remains protected behind layers of security, verified through your phone’s lock screen and biometric ID.
Do you have Google Pay installed? Some Android phones come with it pre-installed, while others don’t. If you don’t see it on your phone, simply head to the Play Store and download it.
How to Use Google Pay in the First Place? (Setup Guide)
Few steps to turn your phone into a digital wallet!
Step 1: Link Google Pay to Your Google Play Store
This step makes sure your app purchases go through smoothly.
- Open the Google Play Store
- Tap your profile icon (top right corner)
- Go to “Payments & subscriptions”
- Choose “Payment methods”
- Select Google Pay
And just like that, it’s ready. If you’ve been wondering how to use Google Pay for app purchases, this is how you connect the dots.
Step 2: Add Your Payment Method
You’ll be asked to add a card. Debit or credit, both work. Google Pay guides you through the steps.
You can:
- Enter your card info manually
- Or scan your card using your phone camera
- Add your billing address if prompted
If you’ve ever bought a movie or subscribed to anything through your Google account, you might already have a card saved.
PayPal works too, in case you prefer that route.
And if you’re wondering how to set up Google Pay for Android apps, this part is key. Verifying the card might mean a text from your bank or a small temporary charge.
Step 3: Subscriptions and Recurring Charges
A lot of apps today want more than a one-time payment. They want you to stick around monthly.
The good news is, that how to pay with Google Pay for subscriptions is no different from single purchases. Once you subscribe, Google handles the rest. It charges you, reminds you, and even lets you cancel easily from your Google account settings.
Just don’t forget to check once in a while. You might be surprised at what you’ve signed up for – YouTube Premium, Google One, or forgotten apps.
Step 4: How to Use Google Pay for Contactless In-Store Payments
Want to use your phone instead of your card at stores? All you need is NFC (Near Field Communication).
Here’s how:
- Go to Settings → Connections → NFC and toggle it ON
- Set Google Pay as your default payment app (if your phone asks)
Then, when you’re at the checkout:
- Wake your phone (unlock if required)
- Hold it near the payment terminal
- Wait for the vibration or check mark
You can use this at any store that supports contactless payments: groceries, cafés, transit stations, and more.
Step 5: Manage Your Cards and Transactions
Once set up, you can:
- Add or remove cards
- Set a default card for in-store payments
- View past transactions
- Get real-time notifications after each purchase
All of this is available in the Google Pay app. You stay in control and up to date.
Try It Out: Make a Small Purchase
Now find an app, maybe one you’ve had your eye on, and tap “Buy” or “Subscribe.” Google Pay should pop up as a payment option. If not, check if it’s set as your default.
Use your fingerprint, PIN, or face ID to confirm. That’s it. No typing, no stress. It’s actually kind of satisfying. You realize you don’t miss the old way.
Some might say it’s a little thing, but using Google Pay this way feels like your phone is finally working with you, not against you.
Some Quirks You Might Run Into
A few bumps here and there.
- If you’re traveling or using a device from another region, how to use Google Pay on the Play Store might depend on local availability.
- Not all banks are supported. You’ll know pretty quickly if your card’s one of them.
- Using an older Android device? There’s a chance Google Pay won’t function as expected.
Still, if your phone is relatively up-to-date and you’ve got a supported payment method, most of this should go off without a hitch.
How to Use Google Pay?
Once you’ve set it up, you can use it on many occasions:
Paying Online: Skip the Card Typing
No more entering card numbers or delivery addresses again and again. On supported online shopping websites or apps such as Airbnb, Uber, Google Play, Gmarket, Coupang, and many others, just choose “Google Pay” at checkout.
The system will automatically pull up your saved cards and shipping info, and a quick tap confirms the payment.
It works across multiple currencies too, so international purchases or overseas shopping are just as easy.
Pro tip: If you’re using Chrome, it can remember your Google Pay settings and make the checkout process even quicker.
Contactless Payments (NFC): Tap and Go
If your phone has NFC (and most Android phones do), you can use Google Pay in physical stores just like swiping a card, only faster and safer.
At checkout in a supported store (like a café, convenience store, or supermarket), simply let the cashier know you’re paying by card. Wake up your phone and hold it near the card reader. You’ll hear a beep or see a checkmark with just a tap.
Popular places that accept Google Pay include:
Starbucks, 7-Eleven, Olive Young, GS25, CU, Emart, and many more.
Heads up:
- Some phones don’t even require unlocking – just waking the screen is enough.
- For larger payments, you might be asked for fingerprint or PIN confirmation.
Send or Receive Money: Handle Small Payments with Ease
Google Pay isn’t just for purchases – you can use it to send money to friends or request payments too.
For example:
- Splitting a dinner bill? Send your share in a few taps.
- Did you get a payment link from a friend? Open it and pay instantly.
- You can even add notes like “Bubble tea” or “Concert ticket” to keep things organized.
Can’t Use Google Pay? Here’s Why and How to Fix It
Now you know how to use Google Pay, but sometimes, Google Pay doesn’t go through, and it can be frustrating.
First, make sure your device isn’t showing “No Internet Connection.” Google Pay needs Wi-Fi or mobile data to process payments. If loading seems unusually slow, switching to Google DNS might help.
Next, check that your card is still valid and hasn’t expired or been blocked by your bank.
If you’re paying in a store, confirm that your phone’s NFC is turned on and that the store actually supports Google Pay.
Most Google Pay issues are easy to fix, but sometimes the cause is a bit more unexpected.
Here are a few less obvious things that could be blocking your payments:
1. Your Phone’s Region Settings
If your device is set to a country where Google Pay isn’t officially supported, even if you’re physically elsewhere, it can prevent the app from working properly.
Using a VPN, like LightningX VPN, to change your location may cause issues. It has 2000+ servers in 70+ countries, helping you easily bypass geo-restrictions.
(Although a VPN can help mask your real location, it can also confuse Google Pay’s system. Google Pay may not recognize that you’re actually in a supported region, leading to transaction failures or the inability to make payments.
If you’re using a VPN to bypass regional restrictions, it’s better to turn it off temporarily when trying to use Google Pay, or make sure you’re connected to a server in a supported region.)
2. Rooted or Custom ROM Devices
Google Pay doesn’t work on rooted phones or those running unofficial operating systems. This is due to security restrictions, and there’s usually no workaround.
3. Outdated or Disabled Google Play Services
Google Pay relies on Google Play Services to function. If it’s outdated, disabled, or malfunctioning, payments may fail although the Google Pay app looks fine.
Final thought
In this case, learning how to use Google Pay for apps isn’t complicated – it just takes a couple of steps.
So, whether you’re buying a game, unlocking premium features, or subscribing to some app you’ll use for three days, this setup gets you there faster.


