


Ever been stuck in a laggy Zoom call or watched your file upload crawl? It’s all about the upload speed.
In this guide, we’ll show you how to increase upload speeds with 12 simple and practical tips, like restarting your router, switching to a wired connection, or using a VPN. Whether you’re working from home, gaming online, or trying to send a file, these steps can help get your internet back to the best performance.
What Is Upload Speed?
Upload speed is how fast your device can send data to the internet. It’s measured in megabits per second (Mbps), and while it might not get as much attention as download speed, it plays a key role in how smoothly things run online.
- Video calls and live streaming: A good upload speed helps keep your video and audio clear during calls or live streams. Without it, you’ll experience lag, freezing, or choppy sound.
- File sharing: Do you need to send large files for work or school? A faster upload speed means less waiting.
- Cloud backups: Strong upload speeds make uploading photos, videos, or documents to the cloud faster and more reliable.
- Online gaming: Real-time gameplay, especially in multiplayer games, depends on fast and stable upload speeds to send your actions to the server without delay.
In general, 20 Mbps is considered decent for most users. However, if you often upload big files, join video conferences, or stream content, 100 Mbps or higher is ideal.
Why Is My Upload Speed So Slow?
If your upload speed feels sluggish, here are some of the most common reasons your upload speed might be lagging:
1. Your Internet Plan Has Low Upload Speeds
Many home internet plans are designed for downloading, not uploading. Streaming and browsing work fine, but sending files or making video calls will not perform well. Many providers cap upload speeds below downloads, especially on cable or DSL plans.
2. Network Congestion
Your network gets crowded when too many people or devices are online at once. Think of it as traffic during rush hour. If you’ve got video calls, backups, and streaming all happening at the same time, your upload speed can take a serious hit.
3. Old or Outdated Equipment
Are you still using that 2012 router? Older routers or modems can’t handle modern internet speeds, especially if they don’t support Wi-Fi 5 (or Wi-Fi 6).
4. Weak Wi-Fi Signal
Wi-Fi is super convenient, but it’s not always reliable. Walls, interference, and the router’s distance can weaken your signal and slow things down.
5. Background Apps Using Bandwidth
Your computer or phone might quietly upload files, sync cloud storage, or run updates in the background. These processes can eat up upload speed without your noticing.
6. ISP Throttling
Some internet providers slow down upload speeds during high-usage periods or for certain tasks, like cloud backups or large file transfers. Throttling could be the culprit if you notice slower speeds at specific times or during particular activities.
7. Malware or Security Issues
Malicious software can use your connection without your knowledge, affecting speed.
How to Increase Upload Speed?
Here are some tips for getting faster uploads if you want to send large files, make smooth video calls, or stream 4K content.
1. Check Your Internet Plan
Your upload speeds may depend on your plan. You can run a speed test to see your actual speeds. Call them if your internet speed isn’t as fast as your carrier promised. They can upgrade you or at least help you find a better plan.
2. Use a Wired Connection
Wi-Fi is convenient, but connecting with an Ethernet cable is usually faster and more stable. If you’re uploading something important, plug your device directly into your router for faster speeds and fewer hitches.
3. Restart Your Router and Modem
Like other devices, routers and modems need to be restarted occasionally. Turn the power off, wait 30 seconds, and then turn it back on. This can clear temporary glitches and instantly increase your upload speeds.
4. Update Your Router’s Firmware
Keeping your router’s firmware updated ensures it’s running efficiently and securely. Many routers update automatically, but older models may need to be updated manually. Check your router’s brand website for instructions.
5. Move your router
The location of your router is critical. Place it in a central, open area away from thick walls, microwaves, and metal appliances. Raising it will also help improve coverage and signal strength.
6. Limit bandwidth-hogging apps and devices
Streaming movies, cloud backups, games – all compete for bandwidth. If your upload speed is slow, try pausing other activities or disconnecting unused devices.
7. Use a VPN
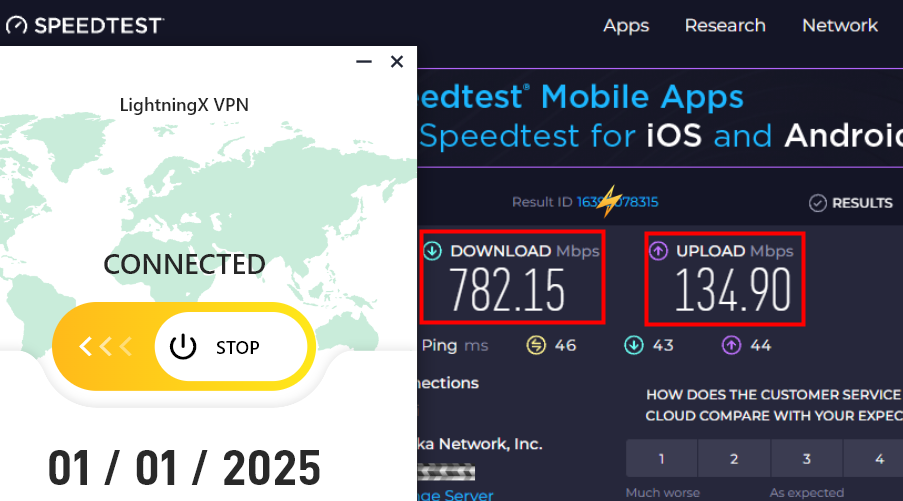
Your Internet Service Provider (ISP) may intentionally limit your connection speed, especially when you’re doing a lot of activity, such as uploading large files or streaming. A VPN (Virtual Private Network) can help bypass these restrictions by encrypting your connection and hiding your online activities. This not only prevents speed throttling but also increases upload speeds.
Read more: Does a VPN Slow Down Your Internet Speed?
LightningX VPN is a good VPN. It has over 2000 servers in 50+ countries with no speed limits. Uses advanced encryption technology to protect your privacy, ensuring a fast and secure connection no matter what you do online. It can help you avoid speed limits and enjoy a faster, more uninterrupted Internet experience, whether streaming, playing games, or uploading large files.
Clearing the cache and cookies can help speed up uploads if you upload via a browser.
How to clear Google Chrome cache and cookies:
- Open Chrome.
- Click the three dots in the top-right corner > Clear browsing data.(Ctrl+Shift+Delete)
- Choose a time range.
- Check Cookies and other site data and Cached images and files.
- Click Clear Data.
9. Change DNS Settings
While DNS primarily helps your browser find websites, changing DNS settings can slightly improve upload performance. Switching to a faster DNS, such as Google or Cloudflare, can make websites and upload services more responsive.
Recommended DNS servers:
- Google DNS: 8.8.8.8 and 8.8.4.4
- Cloudflare DNS: 1.1.1.1 and 1.0.0.1
How to change DNS on Windows:
- Open Network Settings: Press Windows + R, type “control,” → press Enter. Then, go to Network and Internet > Network and Sharing Center.
- Change adapter settings: Click Change adapter settings. Right-click your active connection (Wi-Fi or Ethernet) and select Properties.
- Select IPv4: Find and highlight Internet Protocol Version 4 (TCP/IPv4), then click Properties.
- Enter new DNS addresses: Select Use the following DNS server addresses, then enter the new DNS addresses:
That’s it! You’ll have a smoother upload process.
10. Update network drivers
Outdated drivers can cause various problems, including slow uploads. Please check your computer’s network drivers and update them as needed.
11. Scan and uninstall malware
Malware can occupy your Internet connection in the background, slowing everything down. Please run a full system scan with reliable antivirus software to ensure your system is clean.
Read more: How to Get Rid of Malware [Beginner-friendly Guide]
12. Upgrade your devices
Upgrading to newer hardware, especially those supporting Wi-Fi 6 and MU-MIMO, will bring significant improvements.
How to Check Your Current Upload Speed?
If you want to find out your current upload speed, there are free online tools that provide quick and fairly accurate results. Popular tools include:
- Speedtest: A popular test tool that measures upload and download speeds with a single click.
- Fast.com: Powered by Netflix, it focuses on download speeds and displays upload speeds after a few seconds.
- TestMy.net: A more detailed tool that simulates real-world conditions to give you a more accurate upload speed reading.
Testing steps:
- Visit one of the above websites (Speedtest is used as an example).
- Click “Start Test” or “GO” to get started.
- Wait a few seconds for the tool to measure your upload and download speeds.
- After the test, you will see the results of your upload and download speed.
Tips for improving accuracy:
- Use a wired connection, which is usually more stable than Wi-Fi.
- Close any bandwidth-intensive applications or devices during the test.
- Test multiple times at different times of the day to get an average.
With the above steps, you will get a clearer picture of how your local network is performing and be able to determine whether it needs to be upgraded.
FAQ: Increase Upload Speed
1. Is a 170 Mbps upload speed good?
Yes, a 170 Mbps upload speed is excellent. Most online activities only require around 100 Mbps upload speed.
You can easily handle various online tasks, such as a high-resolution live broadcast, uploading large files to the cloud or sharing platform, and hosting video conferences without lag or buffering. If you want faster Internet during peak hours, you may need higher upload and download speeds, such as 100-200 Mbps.
2. What is a good Mbps upload speed?
A good upload speed is about 10 Mbps. This is usually enough for everyday tasks like sending emails, backing up photos, or making the occasional video call.
But if you frequently upload large files, do HD video chats, or live stream, you’ll need upload speeds above 10 Mbps.
Read more: What Is a Good Upload Speed for Gaming? Complete Guide
3. Can my ISP throttle upload speeds?
Yes, your ISP can limit your upload speed. This practice is called bandwidth throttling and is often used to manage network traffic, enforce data caps, or prioritize certain types of usage. This means that even if you are paying for “high-speed internet,” your upload speed may be deliberately slow.
If you find that your ISP is throttling your internet speed, try using a VPN to improve it or contact your ISP.


