


Your Apple TV is a gateway to endless entertainment, from movies to series, all on your big screen. But what happens when you hit a wall with geo-restricted content? Maybe that show everyone’s talking about isn’t available in your region.
Don’t worry, you can bypass these limits and enhance your streaming with a VPN (Virtual Private Network). A VPN lets you change your virtual location while safeguarding your online privacy. This guide walks you through how to use a VPN on Apple TV with four user-friendly methods, so you can stream freely and securely.
What Is a VPN, and Why Use It on Apple TV?
A VPN, or Virtual Private Network, is a service that allows you to connect to the internet securely and privately. By routing your traffic through a server in another country, a VPN hides your real location and protects your data.
For Apple TV, which doesn’t support VPN apps directly, using a VPN is a powerful way to unlock global content and stay safe online.
Here’s why you’ll want a VPN for your Apple TV:
- Unlock geo-restricted content: Access shows and movies on platforms like Netflix or Hulu that are only available in specific countries.
- Boost online privacy: Keep your streaming habits private from ISPs, hackers, or third parties with encrypted connections.
- Avoid throttling: Some ISPs slow your connection during heavy streaming. A VPN masks your activity, helping you maintain smooth playback.
Related: The Best Apple TV VPN & How to Set up One
Since Apple TV lacks built-in VPN support, you’ll need creative workarounds. The following methods are simpler than they sound, and they’ll have you streaming in no time.
How to Use a VPN on Apple TV (Four Easy Ways)
Apple TV doesn’t natively support VPN apps in all scenarios, but you can secure your connection and access geo-restricted content using a VPN in multiple ways.
Below are four straightforward methods to set up a VPN on your Apple TV, designed for simplicity, reliability, and seamless streaming. Each method caters to different user needs, from plug-and-play solutions to advanced setups.
Method 1. Install and Use LightningX VPN App Directly on Apple TV (Simplest Option)
Since tvOS 17 (2023), Apple TV supports native VPN apps, making this the easiest method for most users. LightningX VPN app (Apple TV version) supports tvOS 17 and later. Below are the detailed steps:
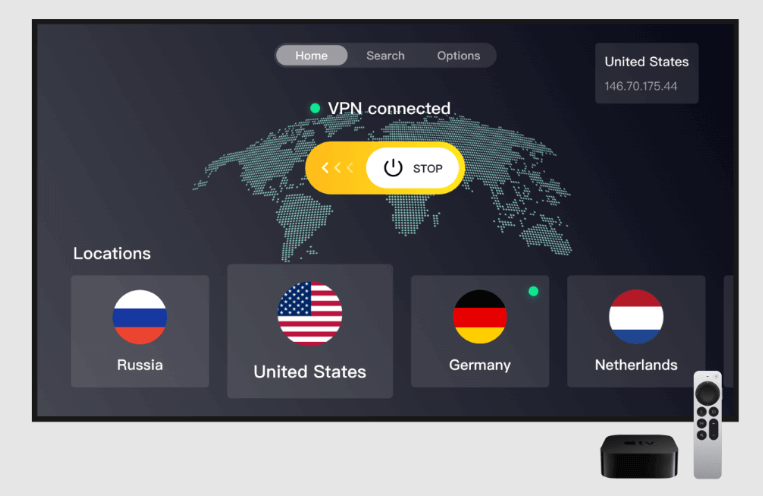
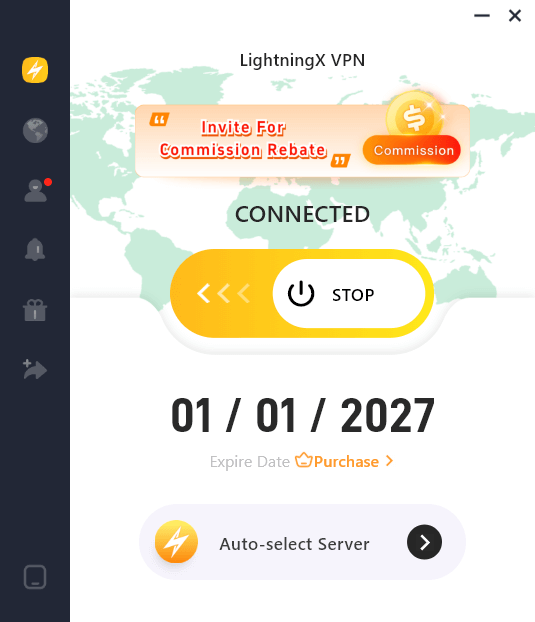
- Step 1. Download and install LightningX VPN: You can open the App Store on your Apple TV and search for LightningX VPN. Then, download and install LightningX VPN on your Apple TV.
- Step 2. Subscribe and sign up: Pick your preferred LightningX VPN plan, subscribe, and receive a random digital account. Enter your account and password to sign in to LightningX VPN.
- Step 3. Select the server you want to connect to. Now, you can begin streaming your favorite content on your Apple TV.
Why You Choose LightningX VPN for Your Apple TV:
- Support tvOS 17 and later.
- Offer 2000+ optimized servers in 70+ countries/regions.
- The best VPN for streaming movies and TV shows across various platforms like Netflix, Hulu, Disney+, etc.
- Help you bypass geo-restrictions and unblock global content.
- Super-fast, stable, unlimited bandwidth.
- Simple to use with one-click connection.
- Strong protection: Use the highest level of EEC encryption.
Tip: If you’re unsure about committing, LightningX VPN’s 30-day money-back guarantee lets you try it risk-free.
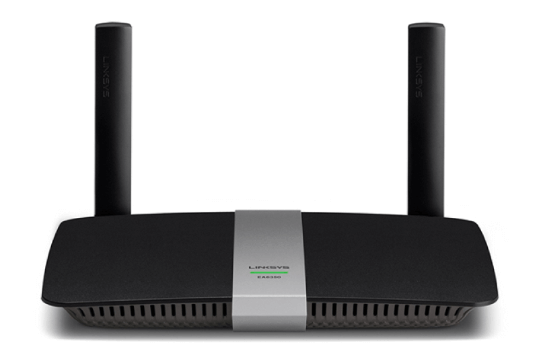
Method 2. Set Up a VPN on Your Router (Best for All Devices)
Configuring a VPN on your router extends protection to all devices on your network, including Apple TV, without needing individual app installations. This is perfect for users who want a comprehensive, low-maintenance solution.
Steps:
- Choose a VPN service: Pick a VPN that supports router setups, such as ExpressVPN or NordVPN. Verify compatibility with your router model.
- Configure the VPN on your router: Access your router’s admin panel (typically via a browser, e.g., 192.168.1.1). Follow your VPN provider’s setup guide to enter VPN credentials and server details. Most providers offer tutorials for popular routers like ASUS, Netgear, or TP-Link.
- Connect Apple TV to the router: On Apple TV, go to Settings > Network > Wi-Fi and connect to the router’s VPN-protected network.
- Test the connection: Open a streaming app and ensure you can access content from the VPN server’s region.
Related: 4 Best VPN Routers & How to Set Up (Ultra-Fast, Reliable)
Tip: If your router isn’t VPN-compatible, consider buying a pre-configured VPN router from your provider for easier setup.
Method 3. Sharing a VPN Connection from a Computer
If you don’t want to set up a VPN on your router or use Smart DNS, you can share a VPN connection from your computer to your Apple TV. Here’s how:
Step 1. Install a VPN on your computer: Choose a VPN service and install it on your computer. Connect to a VPN server in the location you want to appear in.
Step 2. Share the VPN connection:
- On Windows: Go to “Settings” > “Network & Internet” > “Mobile Hotspot.” Turn on “Share my Internet connection.” Choose the VPN connection and enable sharing.
- On Mac: Go to “System Preferences” > “Sharing” > “Internet Sharing.” Choose your VPN connection and select “Wi-Fi” for sharing.
Step 3. Connect Apple TV to the shared connection: On your Apple TV, go to “Settings” > “Network” and connect to the Wi-Fi network you created on your computer.
Step 4. Test the VPN connection: Open a streaming app and see if you can access content from different regions. If you can, your Apple TV is now connected to the VPN via your computer.
Tip: Keep your computer close to your Apple TV to ensure a stable Wi-Fi signal.
Method 4. Using Smart DNS for Streaming (Lightweight Alternative)
If setting up a VPN on your router seems too complicated, another option is to use a Smart DNS service. Smart DNS is not a VPN, but it helps you access geo-restricted content by changing your DNS settings.
Related: Smart DNS & Alternative VPNs (Definition, Features, Setup)
Here’s how to use Smart DNS on Apple TV:
Step 1. Choose a VPN with smart DNS: Some VPN providers, like ExpressVPN and NordVPN, offer a Smart DNS feature. Choose a VPN service that includes Smart DNS in its package.
Step 2. Get the smart DNS address: Log in to your VPN account and find the Smart DNS section. Note down the DNS addresses provided by the VPN service.
Step 3. Configure DNS on Apple TV: Go to the “Settings” menu on your Apple TV. Navigate to “Network” and select your Wi-Fi connection. Click on “Configure DNS” and choose “Manual.” Enter the Smart DNS addresses you noted earlier.
Step 4. Restart Apple TV: After entering the DNS addresses, restart your Apple TV. This will apply to the new DNS settings.
Step 5. Access geo-restricted content: Open a streaming app and check if you can access content from other regions. If everything is set up correctly, you should now be able to watch shows and movies that were previously unavailable in your region.
Tip: Smart DNS is ideal for users who prioritize streaming performance over data encryption.
Things to Consider When Using a VPN on Apple TV
While using a VPN on Apple TV has many advantages, there are some things to keep in mind:
- Speed and performance: VPNs can sometimes slow down your internet connection because of encryption and routing through different servers. Choose a VPN provider with high-speed servers to avoid buffering issues.
- VPN compatibility: Not all VPN services are compatible with routers or Smart DNS. Make sure to check with the VPN provider before purchasing.
- Content availability: While a VPN can help you access more content, it may not work with all streaming services. Some platforms have advanced VPN detection systems that can block VPN traffic.
- Security and privacy: Always choose a reputable VPN service that does not log your activities. This ensures your online privacy is protected at all times.
Conclusion
Using a VPN on Apple TV can greatly enhance your streaming experience. It provides access to a wider range of content and protects your online privacy.
This post introduces what is a VPN, why you need to use it on Apple TV, and how to use a VPN on Apple TV. Follow the steps provided in this guide, and you’ll be streaming content from around the world in no time!


