


Are you tired of unreliable VPNs that slow down your connection or fail to protect your privacy? A weak or untested VPN can expose your real IP address, leak DNS requests, or leave security gaps that put your data at risk.
In this guide, we’ll walk you through the most effective VPN tests, including IP, DNS, WebRTC, and speed checks, to help you find the best VPN for privacy, security, and performance. Let’s get started.
How to Check If Your VPN is Working?
Test 1: Test VPNs for IP Leaks?
Is your VPN really hiding your IP address? Here’s a quick and easy guide to help you check for IP leaks!
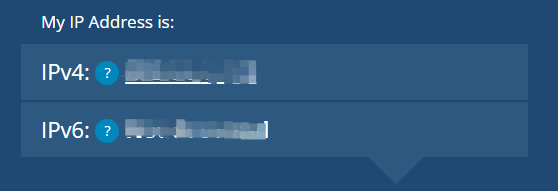
Step 1: Disconnect from your VPN and use an IP detector to check your real IP address.
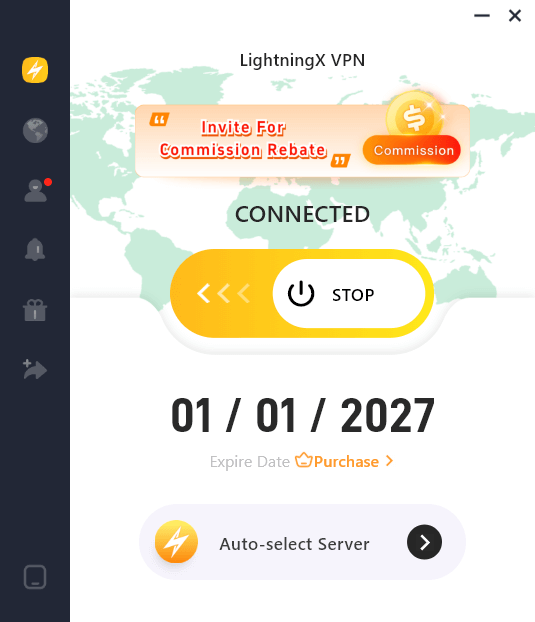
Step 2: Activate your VPN and connect to servers in different locations.
Step 3: Use the IP checker again. Your IP should match the VPN server location. If it doesn’t, you have an IP leak.
Step 4: If it shows your actual location, it means your IPv6 address has been leaked.
How to Fix IP Address Leaks?
- Choose the best VPN: LightningX VPN has strong privacy features.
- Enable leak protection features:
- Kill switch: Cut off the internet if the VPN fails.
- Private DNS: Encrypt DNS requests.
- WebRTC blocker: Block WebRTC leaks.
- Manage IPv6 traffic: If your VPN does not support IPv6, disable
- IPv6 in the device settings.
By following these steps, you can effectively test your VPN and ensure no IP leaks.
Test 2: Test VPN for DNS Leak
Even if your VPN hides your IP address, your DNS requests might still leak and expose your real location. Here’s how to test and fix a DNS leak:
Step 1: First, disconnect your VPN and use a DNS leak test tool to check your DNS server locations. Note the results — they’ll usually show your ISP’s DNS.
Step 2: Connect your VPN and Test DNS leaks again.
Step 3: If your VPN works correctly, the DNS servers shown should match your VPN’s server location, not your ISP. If they don’t, your VPN may be leaking DNS data.
How to fix DNS leaks?
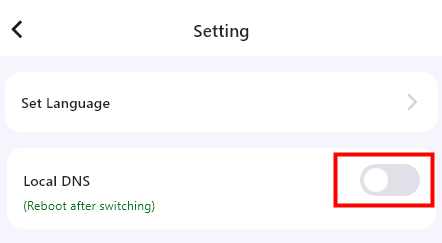
- Check your VPN settings and ensure it’s using its own DNS.
- Switch to trusted providers like Google DNS (8.8.8.8 / 8.8.4.4) or Cloudflare DNS (1.1.1.1 / 1.0.0.1).
- If the issue persists, ask for advanced troubleshooting.
- Turn off IPv6 in your router or system settings to prevent DNS bypass.
- After changes, clear your browser cache and rerun the DNS leak test to confirm the problem is fixed.
Following these steps, you can effectively test your VPN for DNS leaks.
Test 3: How to Test VPN for WebRTC Leaks?
After checking for IP and DNS leaks, the next step is to see whether your VPN leaks your real IP address through WebRTC. Here’s how to test VPN for WebRTC leaks:
- Step 1: Visit a VPN checker or WebRTC leak test tool while disconnected from your VPN and note your real IP address.
- Step 2: Connect your VPN and run the WebRTC leak test again.
- Step 3: Review the results. If the IP address shown is still your real one, your VPN has a WebRTC leak.
How to fix a WebRTC leak?
- Choose a VPN with WebRTC protection and make sure this feature is activated in the VPN settings.
- Disable WebRTC in your browser:
- Chrome: Type chrome://settings/content/webrtc in the address bar and disable it.
- Firefox: Go to about:config, find media.peerconnection.enabled, and set it to false.
- Safari: There is no direct option to disable WebRTC.
- Use browser extension: Search for “WebRTC Leak Blocker” in your browser’s extension store and add it to prevent leaks.
Test 4: Test VPN Speed
In addition to the leak test above, network speed is the most important VPN test. Testing VPN speed is essential for smooth browsing, streaming, and downloading.
Step 1: Run the speed test tool without VPN.
Step 2: Connect to your VPN and run the speed test again.
Step 3: Compare the results.
Generally, network speed should retain 80% to 90% of the original speed. The smaller the speed difference, the better your VPN performance.
Read more: Does a VPN Slow Down Internet? Speed Test, Causes and Fixes
Tips:
Download speed: Higher speed means faster website loading, video streaming, and file downloading.
Upload speed: Important for video calls, live streaming, and sharing content online.
Ping (latency): Lower ping is better for online gaming and real-time chatting.
How to increase VPN speed?
- Switch servers: Choose a closer or less crowded server.
- Change protocols: Try faster protocols like WireGuard or IKEv2.
- Wired connection: Use a wired connection for better stability and speed.
With these steps, you can effectively test your VPN speed and make sure it meets your needs.
Test 5: Test If Your VPN Connection Is Blocked
VPNs are great for accessing restricted websites, but some platforms actively detect and block VPN traffic. Here’s how to test your VPN connection:
Step 1: Connect to your VPN and try to access a website that restricts VPN users.
Step 2: Switch to another server in your VPN app. If the site loads on a different server, it means the previous server’s IP was detected and blocked.
How to Bypass VPN Blocks?
1. Enable Obfuscation Protocols: Turn on obfuscation or “stealth” mode to make your VPN traffic look like normal HTTPS data.
2. Use Multi-Hop VPN: Route your traffic through two or more VPN servers for better anonymity and a lower chance of being blocked.
3. Override Protocol and Port Settings: Manually set up your VPN to use ports like TCP 80 and 443, commonly used by regular websites.
By following these steps, you can quickly test whether your VPN is blocked, verify that it is working, and use the right settings to regain full access.
8 Best VPN Test Websites
Want to make sure your VPN is really protecting your privacy? These VPN test websites help you check for IP, DNS, and WebRTC leaks and verify if your VPN is working properly.
- ipleak.net: A comprehensive VPN leak test tool by AirVPN that checks for IPv4, IPv6, WebRTC, and DNS leaks all in one place.
- Perfect Privacy Test Tools: Run multiple VPN leak checks for IPv4, IPv6, DNS, and WebRTC. Trusted by advanced privacy users.
- ExpressVPN Leak Tests: ExpressVPN’s built-in VPN checker helps detect IP, DNS, and WebRTC leaks quickly and accurately.
- test-ipv6.com: A reliable tool to see if your VPN hides both IPv4 and IPv6 addresses properly.
- dnsleaktest.com: Use the “Extended Test” option to detect hidden DNS leaks that expose your real location.
- BrowserLeaks WebRTC Test: Specifically checks for WebRTC leaks.
- IPX.ac: Tests for IPv4, IPv6, WebRTC, DNS leaks, browser fingerprinting, location data, and more. (Provided by VPN.ac)
- ipleak.org: Another easy-to-use tool by VPNArea to verify IPv4, IPv6, DNS, and WebRTC protection.
VPN Test Results: How Well Does LightningX VPN Perform?
We conducted a series of VPN tests on LightningX VPN using trusted third-party tools to evaluate its privacy protection and performance.
Results:
- IP Leak: No leaks detected.
- DNS Leak: No DNS leaks found.
- WebRTC Leak: Protected successfully.
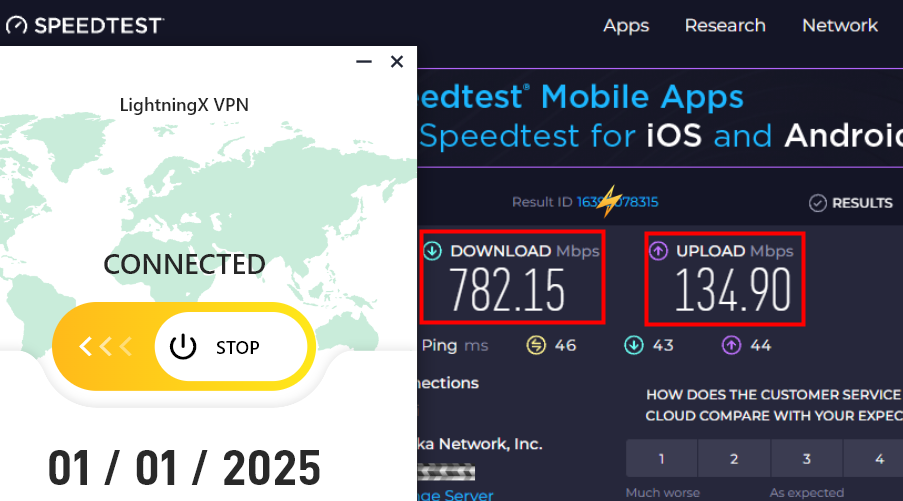
- Speed: Excellent performance — speeds remained high (up to 600+ Mbps) with minimal slowdown.
- Streaming Access: Successfully accessed major platforms such as Netflix and other geo-restricted services.
Overall, LightningX VPN performed well across all VPN leak tests, maintaining strong privacy protection and stable speeds suitable for streaming, browsing, and everyday use.
Why the VPN Isn’t Working?
Why is your VPN connected but not working? Let’s find out!
- Unstable connection: Your local internet connection is unstable. Check if your firewall or other security tools are affecting your VPN.
- Server is overloaded: If your browser is loading slowly, it could be because the server you are connected to is overloaded or your ISP is being throttled.
- VPN is restricted: Your country, workplace, or school prohibits using VPNs, which could be one reason your VPN is not connecting.
- Free VPNs with viruses: Free VPNs may come with malware, viruses, or ads. These viruses can harm your computer security. Protect your network with LightningX VPN.
- Wrong VPN settings: Check your VPN settings and ensure you connect to the right protocol, server, and port.
- Contact VPN provider: When none of the above methods work, contact your VPN provider. LightningX VPN offers excellent online customer service, so feel free to ask us questions!
So, if your VPN is having trouble, check this checklist and return to smooth, secure browsing!
Conclusion
Now that you’ve found a reliable VPN and completed a thorough VPN test, your work isn’t over yet.
To stay truly protected, make a habit of testing your VPN regularly. Continuous VPN checks help ensure your connection remains secure, your IP stays hidden, and your VPN performs at its best.


